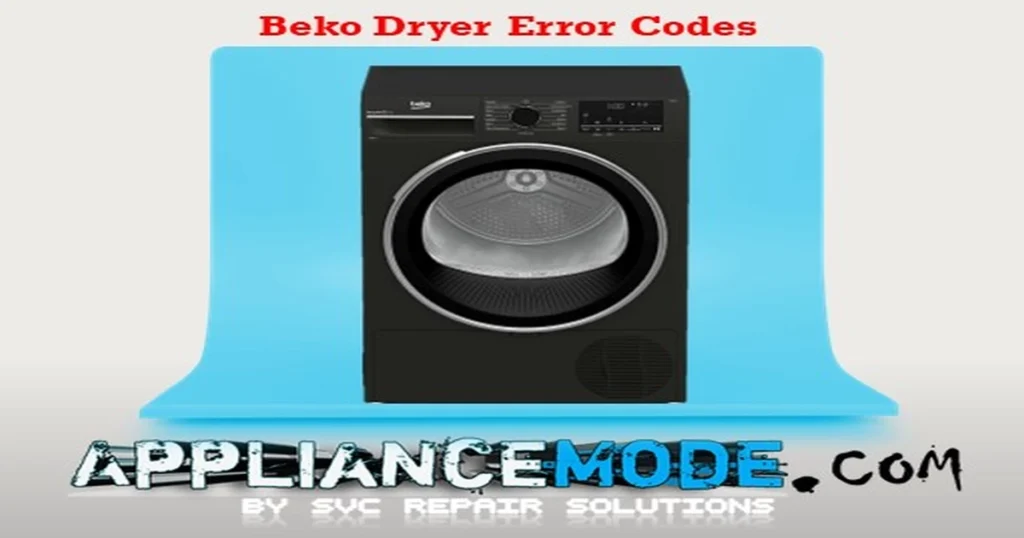
Understanding Your Beko Dryer: A Guide to Error Codes and Test Mode
This guide explains some of the most common Beko dryer error codes and provides troubleshooting steps. We’ll also walk you through how to access and use the dryer’s test mode for more in-depth diagnostics.

Important Safety Note: Always unplug your dryer from the power source before attempting any inspection or repair. Exercise caution when working with electrical components. If you are not comfortable performing any of the steps described, it is recommended to contact a qualified appliance technician.
Common Beko Dryer Error Codes and Solutions
Here are some frequently encountered error codes and what they signify:
E00: No Error Code
- Meaning: The dryer’s system has detected no active faults.
- Solution: No action is needed. The dryer is functioning correctly or any previous error has been resolved.
E01: Door Lock Switch Error
- Related Error Code: E04 (The dryer starts when the door is opened).
- Meaning: Indicates a problem with the door locking mechanism or the switch that detects if the door is properly closed and locked.
- Possible Causes/Checks:
- The door is not closed completely.
- Something is obstructing the door, preventing it from closing and locking correctly.
- The door latch or catch is damaged or misaligned.
- The wire harness connection to the door lock is loose or damaged.
- The door lock switch itself is faulty.
- Overloading the dryer, which can sometimes cause the door to open during operation.
- Solutions:
- Ensure the dryer door is firmly closed and latched. Check for any trapped laundry or objects.
- Inspect the door latch and the catch on the dryer body for damage. Replace if necessary.
- Check the wire harness connector and ensure all sockets are properly inserted at the door lock and the main control board.
- Test the door micro-switch resistance using a multimeter. When the door is normal (open), the resistance should be infinite (∞Ω or OL). When the door is engaged (closed), the resistance should be approximately 0.1 – 1.0 Ω. Replace the door lock assembly if the readings are abnormal.
- If the issue persists after checking the above, the main PCB may be faulty and require replacement.
E02: Water Tank Full Error
- Meaning: The dryer’s water collection tank is full, or there is an issue with the water drainage system or sensor.
- Possible Causes/Checks:
- The condensation water tank is full.
- There is an object (like lint or fluff) blocking the tank or the sensor area.
- The wire harness connection to the overflow switch or pump is loose or damaged.
- The overflow switch is faulty.
- The drain pump is not functioning correctly.
- Solutions:
- Empty the condensation water tank. Ensure there are no blockages inside the tank or the area where it sits.
- Check the wire harness connections to the overflow switch and the drain pump.
- Test the overflow micro-switch resistance with a multimeter. It should be infinite (∞Ω or OL) when normal (open) and approximately 0.1 – 1.0 Ω when engaged (simulating a full tank). Replace the switch if readings are abnormal.
- Check the resistance of the drain pump. The expected ohmic value is typically between 209 – 1395 Ω. Replace the pump if the reading is outside this range.
- If your model has a test mode with a pump activation step, use it to verify the pump is operating correctly and pumping water.
- If the error continues, the main control board may need to be replaced.
E03: Drum-Empty Error
- Meaning: The dryer’s sensor is not detecting a load in the drum, or there’s an issue with the moisture sensing system. This can happen if the load is too small or not wet enough.
- Possible Causes/Checks:
- The laundry load is too small or too dry for the sensor to detect.
- The moisture sensor is dirty or faulty.
- Solutions:
- Ensure there is a sufficient amount of laundry in the drum and that the clothes are wet enough at the start of the cycle. Sort items to avoid very small or dry loads.
- Clean the moisture sensor, typically located inside the drum (often near the lint filter). Refer to your user manual for its exact location.
- Test the moisture sensor using the test mode if available (as described in the test mode section).
E05: Dryer Takes Too Long to Dry Error
- Meaning: The drying cycle is taking excessively long to complete. This is often related to airflow issues or incorrect loading.
- Possible Causes/Checks:
- The dryer is overloaded.
- The laundry is too wet from the washing machine cycle.
- The lint filter screen is clogged.
- The condenser filter is clogged.
- Solutions:
- Avoid overloading the dryer. Refer to your user manual for recommended load sizes for different fabric types and programs.
- Ensure your washing machine’s spin cycle is adequate (usually between 600 rpm and 1000 rpm for most fabrics) to remove excess water before transferring clothes to the dryer.
- Thoroughly clean the lint filter screen before or after every cycle.
- Clean the condenser filter regularly according to your user manual’s instructions. Blockages in these filters severely restrict airflow and drying performance.
E06: Door NTC Sensor Open Circuit Error
- Related Error Codes: E07 (Door NTC sensor short circuit error), E08 (Door NTC sensor overheat error).
- Meaning: Indicates a problem with the temperature sensor located near the door, specifically an open circuit (broken wire or connection).
- Possible Causes/Checks:
- Loose or damaged wire harness connection to the door NTC sensor.
- The door NTC sensor is faulty (open circuit).
- Restricted airflow due to clogged filters or vent.
- Solutions:
- Check the wire harness connection to the door sensor, ensuring all sockets are properly inserted.
- Test the resistance of the door NTC sensor. At 25°C, the resistance should be approximately 12 KΩ. An abnormal reading for an open circuit would be infinite (∞Ω or OL). Readings around 0.1 – 1.0 Ω would indicate a short circuit (E07). Replace the sensor if readings are abnormal.
- Check for restricted airflow. Clean the lint filter screen and the condenser filter. Ensure the external dryer vent is not blocked.
- If the problem persists, the main PCB may need to be checked and replaced.
E09: Heater NTC Sensor Open Circuit Error
- Related Error Codes: E10 (Heater NTC sensor short circuit error), E11 (Heater NTC sensor overheat error).
- Meaning: Indicates a problem with the temperature sensor associated with the heating element, specifically an open circuit.
- Possible Causes/Checks:
- Loose or damaged wire harness connection to the heater NTC sensor or heating element.
- The heater NTC sensor is faulty (open circuit).
- The self-resetting thermostat has tripped or is faulty.
- The heating element is faulty.
- Restricted airflow due to clogged filters or vent.
- Solutions:
- Check the wire harness connections to the heater sensor and heating element, ensuring all sockets are properly inserted.
- Test the resistance of the heater NTC sensor. At 25°C, the resistance should be approximately 15.2–19.5 KΩ. Abnormal readings for an open circuit would be infinite (∞Ω or OL). Readings around 0.1 – 1.0 Ω would indicate a short circuit (E10). Replace the sensor if readings are abnormal.
- Check the self-resetting thermostat (often a red button on the heating element housing). If it has tripped, press it to reset. If it trips repeatedly or doesn’t reset, it may be faulty. Test its resistance; it should be approximately 0.1 – 1.0 Ω at 160°C and infinite (∞Ω or OL) if faulty (open).
- Check the resistance of the heating element coils. The primary heater resistance is typically around 32.3 Ω. The secondary heater resistance is typically around 73.6 Ω. Abnormal readings (infinite or near zero) indicate a faulty element. Replace the heating element assembly if needed.
- Check for restricted airflow. Clean the lint filter screen and the condenser filter. Ensure the external dryer vent is not blocked.
- If the issue continues, the main PCB may need to be checked and replaced.
E12: Belt-Broken Error
- Meaning: The dryer’s drive belt has broken or come off, or there is an issue preventing the drum from rotating.
- Possible Causes/Checks:
- The drive belt is broken or loose.
- The motor pulley is damaged.
- The motor clamp is loose.
- The idler assembly (tension pulley) is seized or broken.
- The drum rollers are worn or seized.
- Obstructions in the drum’s path (e.g., item stuck).
- A clogged dryer filter screen causing resistance.
- Solutions:
- Unplug the dryer and access the drum and belt area (usually from the rear or front panel, depending on the model – consult your service manual).
- Inspect the drive belt. If broken, replace it. If loose, check the tensioner/idler pulley.
- Check the motor pulley, motor clamp, idler assembly, and drum rollers for damage or wear. Replace any faulty components.
- Ensure the drum can rotate freely by hand. Check for any obstructions.
- Check and clean the main dryer filter screen if applicable (some models have a screen beyond the lint filter).
- If mechanical components are intact, the issue could be with the motor or main PCB; however, mechanical issues are more common for this code. If necessary, check and replace the main PCB.
E13: Clogged Filter Error
- Meaning: Indicates that the airflow is restricted, most likely due to clogged filters.
- Possible Causes/Checks:
- The lint filter screen is full.
- The condenser filter is dirty.
- Solutions:
- Thoroughly clean the lint filter screen.
- Thoroughly clean the condenser filter.
E14: Rapid Temperature Increase Error
- Related Error Code: E15 (Temperature difference is high between heater and door NTC error).
- Meaning: The temperature inside the dryer is increasing too quickly, suggesting a severe airflow restriction or a sensor issue.
- Possible Causes/Checks:
- Severely restricted dryer vent.
- Clogged lint filter screen or condenser filter.
- Lint buildup on temperature sensors.
- Solutions:
- Check the entire dryer vent path for blockages, from the back of the dryer to the external vent hood. Clean out any lint accumulation.
- Clean the lint filter screen and the condenser filter thoroughly.
- Inspect and carefully clean any lint or debris from the door NTC and Heater NTC sensors.
E16: Low Voltage Error
- Meaning: The power supply voltage to the dryer has dropped below an acceptable level (typically below 170 Vac). The dryer usually enters a standby mode until the voltage stabilizes.
- Possible Causes/Checks:
- Problem with the household electrical supply.
- Issue with the power outlet, cord, or internal wiring of the dryer.
- Solutions:
- Check the power supply at the outlet using a multimeter to ensure it is within the normal range (usually 220-240 Vac).
- If the voltage is correct at the outlet, but the error persists, there may be an issue with the dryer’s internal power components or the main board. In this case, replace the main board.
E17: High Voltage Error
- Meaning: The power supply voltage to the dryer is too high (typically exceeding 260 Vac). The dryer will stop operating to protect components.
- Possible Causes/Checks:
- Problem with the household electrical supply (voltage surge).
- Issue with the dryer’s internal power components or main board.
- Solutions:
- Check the power supply at the outlet using a multimeter to ensure it is within the normal range (usually 220-240 Vac).
- If the voltage is consistently too high, there is an issue with your home’s electrical system, and an electrician should be consulted.
- If the voltage at the outlet is correct, but the error persists, replace the main board.
E18 – E27: BLDC Motor Communication and System Errors
- Related Error Codes: E18 (BLDC communication error), E19 (BLDC System paused error), E20 (BLDC RPM tolerance error), E21 (BLDC minimum RPM error), E22 (BLDC reenergized error), E23 (BLDC abnormal voltage error), E24 (BLDC overheat error), E25 (BLDC locked rotor error), E26 (BLDC overspeed error), E27 (BLDC Overcurrent error).
- Meaning: These codes indicate various issues with the Brushless DC (BLDC) motor system, which includes the motor itself, the inverter board that controls it, and the communication between the inverter and the main control board.
- Possible Causes/Checks:
- Loose or damaged wire harness connections between the main board and the inverter board, or between the inverter board and the BLDC motor.
- The BLDC motor is faulty.
- The inverter board is faulty.
- Mechanical resistance preventing the motor from turning freely (e.g., belt issue, drum obstruction – though E12 is specific to the belt).
- Solutions:
- Unplug the dryer. Check the wire harness connections between the main control board and the inverter board, and between the inverter board and the BLDC motor. Ensure connections are secure and undamaged.
- Test the resistance of the BLDC motor windings. The typical ohmic value is around 5.4 – 9.8 Ω. Replace the motor if the reading is outside this range or shows an open circuit.
- Inspect the inverter board for any visible signs of damage (burnt components, etc.). If the wiring and motor test correctly, the inverter board is likely faulty and needs replacement.
- If all other components check out, the main board may be the source of the communication error and require replacement.
BEKO Dryer Test Mode
Accessing the test mode can help verify the operation of various components and retrieve stored error codes.
Preparation: Ensure the drum is empty and the program selector knob is in the off position before attempting to activate test mode.
How to Activate Test Mode:
- Press and hold the “Dryness Level” and “Start/Pause” buttons simultaneously.
- While holding the buttons, turn the program selector knob 90° clockwise (usually to the 4th program position).
- Within 2 seconds, the buzzer should sound, and the display will show “SCn” to indicate that test mode is active.
- Use the “Start/Pause” button to advance through the test cycle steps or skip a step.
Test Cycle Functions Explained:
- Step 1: Display Checking
- The display shows “88:8” and all LEDs blink. This verifies that all display segments and lights are working.
- Step 2: Software Version Checking
- The display shows the software version, e.g., “u03”.
- Step 3: Software Revision Checking
- The display shows the software revision number, e.g., “r04/400”.
- Step 4: Software Security Number Checking
- The display shows the software security number, e.g., “500”.
- Step 5: Software Parametric Checking
- The display sequentially shows the revision of the parametric software and its number, e.g., “P01” followed by “r12”.
- Step 6: Display Re-checking
- The display again shows “88:8” and all LEDs blink, re-verifying the display.
- Step 7: Displaying Stored Error Codes
- The display will show “E00” if no error codes are stored.
- If error codes are present, “ECd” or “EXX” (where XX is the code number) will appear.
- Note on Clearing Error Codes: To clear error codes from the control board, turn the selector knob 90° clockwise (to the 8th program position) while in test mode, and then immediately turn it back to its initial test mode position (4th program). “E00” will be displayed automatically to confirm that the error code has been successfully deleted.
- Step 8: Door and Heater Sensors Check
- The display alternately shows the temperature readings from the door sensor (“dXX” where XX is the temperature) and the heater sensor (“hXX” where XX is the temperature), e.g., “d25” and “h45”.
- If the door NTC sensor has an open circuit, “d:OC” will be displayed.
- If the door NTC sensor has a short circuit, “d:SC” will be displayed.
- If the heater NTC sensor has an open circuit, “h:OC” will be displayed.
- If the heater NTC sensor has a short circuit, “h:SC” will be displayed.
- Step 9: Motor Rotation 1 and Moisture Sensor Check
- The display shows “Drr”. The motor rotates in a clockwise direction.
- After 3 seconds of opening the dryer door (to stop the motor rotation temporarily), put your hand on the moisture sensor strips inside the drum to create a short circuit.
- The display should change to “Sco” to confirm the moisture sensor is working correctly.
- If “ScE” is displayed instead of “Sco”, the moisture sensor or its wiring may be faulty. Turn off the appliance and reactivate test mode to re-test. If “ScE” persists, check the sensor wire harness connector and the moisture sensor itself. Replace components based on your findings and re-test. If the error still persists, the main PCB may be faulty.
- Step 10: Motor Rotation 1 and Secondary Heater Check
- The display shows “rHn”. The motor continues to rotate clockwise, and the secondary heating element (typically 1600 watts) is energized.
- Step 11: Motor Rotation 1 and Primary Heater Check
- The display shows “rHH”. The motor continues to rotate clockwise, and the primary heating element (typically 2300 watts) is energized.
- Step 12: All Components Stop
- The display shows “StP”, indicating that all active components have stopped.
- Step 13: Motor Rotation 2 and Moisture Sensor Check
- The display shows “Soo”. The motor rotates in a counterclockwise direction. The moisture sensor should read an open circuit in this step (since your hand is removed), which is the expected behavior.
- Step 14: All Components Stop
- The display shows “StP”, indicating that all active components have stopped again.
- Step 15: Discovery of the Last Error Codes
- The display shows the most recent stored error code, either “E00” (no error) or “EXX” (the code number). This error code cannot be deleted from this step.
- Step 16: Test Mode Ends
- The display shows “END”. The test cycle is complete. Turn off the dryer by rotating the program selector knob back to the off position.
How to Deactivate Test Mode: Turn off the appliance by rotating the program selector knob to the off position.
By using this guide, you can gain a better understanding of your Beko dryer’s error codes and potentially diagnose and fix common issues yourself. Remember to prioritize safety and consult a professional if you encounter complex problems or are unsure about any repair steps.

I am a master Appliance Repair technician with over 35 years of experience in the field. I am passionate about helping people troubleshoot their appliances and fix common problems. My website, appliancemode.com, provides a wealth of information on troubleshooting common appliance issues and deciphering error codes. This website aims to empower people to tackle appliance repairs themselves and save money on service calls.


