

Beko Refrigerator Error Codes Explained: Complete Troubleshooting Guide
Modern Beko refrigerators are equipped with advanced electronic diagnostics that continuously monitor temperatures, sensors, fans, defrost systems, and ice makers. When the appliance detects a fault, it displays an error code on the control panel to help identify the affected component.
This comprehensive guide explains the most common Beko refrigerator error codes found on French-door, bottom-freezer, side-by-side, multi-door, and Multizone models. You’ll learn what each error code means, the most likely causes, and the diagnostic steps used by professional appliance technicians to locate the fault.
Before You Begin Troubleshooting
Always follow proper safety procedures before inspecting or testing any refrigerator components:
- Unplug the refrigerator from the power outlet.
- Wear insulated gloves when handling electrical components.
- Use caution around sharp metal edges behind access panels.
- Never test live electrical circuits unless you are properly trained.
- If sealed-system components are involved (compressor, refrigerant lines, evaporator, condenser), contact a qualified technician.
Understanding Beko Refrigerator Error Codes
Most Beko refrigerator error codes indicate a problem with one of the following systems:
- Temperature sensors (thermistors)
- Defrost heaters and thermal fuses
- Evaporator and condenser fans
- Ice maker assemblies
- Multizone/Joker compartment components
- Electronic control boards
The control board constantly monitors these components and triggers an error whenever it detects an open circuit, short circuit, communication failure, or abnormal operating condition.
Below you’ll find a complete breakdown of the most common Beko refrigerator error codes and their troubleshooting procedures.
E0 – Freezer Sensor Error
The E0 error indicates that the freezer temperature sensor circuit is open or shorted. Because the control board cannot accurately monitor freezer temperature, cooling performance may become inconsistent.
Possible Causes
- Loose sensor connector
- Damaged wire harness
- Failed freezer thermistor
- Faulty main control board
Troubleshooting
- Inspect the freezer sensor wiring and connector.
- Check for corrosion, damaged wires, or loose terminals.
- Measure sensor resistance using a multimeter.
| Temperature | Expected Resistance |
|---|---|
| -10°C (14°F) | ~55 kΩ |
- Replace the sensor if readings are incorrect.
- If the sensor tests good, inspect the main control board.
E1 – Freezer Evaporator Sensor Error
The E1 error indicates a failure in the evaporator temperature sensor located near the freezer evaporator coil.
Possible Causes
- Faulty evaporator sensor
- Damaged wiring harness
- Defective control board
Troubleshooting
| Temperature | Expected Resistance |
|---|---|
| -15°C (5°F) | ~72.5 kΩ |
Check wiring continuity, measure sensor resistance, and replace the sensor if necessary.
E2 – Refrigerator Evaporator Sensor Error
The E2 error appears when the refrigerator evaporator sensor circuit is detected as open or shorted.
Symptoms
- Poor cooling
- Excessive frost buildup
- Inconsistent temperatures
Troubleshooting
| Temperature | Expected Resistance |
|---|---|
| 5°C (41°F) | ~25.3 kΩ |
Inspect the sensor wiring and replace the sensor if readings are outside specifications.
E3 – Refrigerator Sensor Error
The E3 error indicates a fault with the main refrigerator compartment temperature sensor.
Possible Causes
- Defective thermistor
- Loose wiring connection
- Failed control board
Troubleshooting
| Temperature | Expected Resistance |
|---|---|
| 25°C (77°F) | ~10 kΩ |
Replace the sensor if resistance readings are abnormal.
E4 – Freezer Defrost System Error
The E4 error usually occurs when the freezer fails to complete a defrost cycle successfully.
Possible Causes
- Failed defrost heater
- Open thermal fuse
- Defective defrost sensor
- Frozen drain system
- Faulty control board
Troubleshooting
Check the following components:
| Component | Expected Value |
|---|---|
| Defrost Heater | 350–450 Ω |
| Thermal Fuse | 0.1–1 Ω |
| Drain Heater | 2830–5970 Ω |
| Defrost Sensor | 72.5 kΩ @ -15°C |
Replace any component that tests outside specifications.
E8 – Ice Maker Sensor Error
The E8 error indicates that the ice maker temperature sensor is not operating correctly.
Possible Causes
- Failed ice maker thermistor
- Wiring fault
- Main board failure
Troubleshooting
| Temperature | Expected Resistance |
|---|---|
| -15°C (5°F) | ~72.5 kΩ |
Check sensor resistance and wiring continuity.
E9 – Ice Maker Error
The E9 error points to a malfunction within the ice maker assembly itself.
Possible Causes
- Ice maker motor failure
- Jammed ice tray
- Wiring issue
- Main board failure
Troubleshooting
- Run the ice maker test cycle.
- Verify motor rotation in both directions.
- Check for 12 VDC at the ice maker motor.
- Replace the motor if voltage is present but the motor does not operate.
E10 – Multizone/Joker Sensor Error
This error applies to Beko refrigerators equipped with a Multizone or Joker compartment.
Troubleshooting
| Temperature | Expected Resistance |
|---|---|
| -5°C (23°F) | ~42.5 kΩ |
Inspect sensor wiring and replace the sensor if readings are abnormal.
E11 – Multizone/Joker Evaporator Sensor Error
The E11 error indicates a failure of the evaporator sensor inside the Multizone compartment.
Troubleshooting
- Inspect wiring connections.
- Measure sensor resistance.
- Replace the sensor if readings are outside specifications.
E12 – Multizone Defrost Heater Error
The E12 error indicates a failure in the Multizone compartment defrost system.
Components to Test
| Component | Expected Resistance |
|---|---|
| Defrost Heater | 407–588 Ω |
| Thermal Fuse | 0.1–1 Ω |
| Drain Heater | 1392–4408 Ω |
Replace any failed component.
E13 – Freezer Fan Error
The E13 error occurs when the control board cannot detect proper freezer fan operation.
Symptoms
- Freezer temperature rises
- Uneven cooling
- Frost accumulation
Troubleshooting
- Remove evaporator cover.
- Check for ice buildup blocking the fan.
- Verify fan voltage.
| Test | Expected Value |
|---|---|
| Supply Voltage | 12 VDC |
| Feedback Signal | 2.4 VDC |
Replace the fan motor if necessary.
E14 – Multizone Fan Error
The E14 error indicates a problem with the fan motor inside the Multizone compartment.
Troubleshooting
- Check for ice accumulation.
- Verify wiring connections.
- Measure fan voltage.
- Replace the fan motor if defective.
E15 – Condenser Fan Error
The E15 error indicates a failure of the condenser cooling fan.
Symptoms
- Refrigerator runs constantly
- Compressor overheating
- Poor cooling performance
Troubleshooting
- Remove the rear service panel.
- Clean accumulated dust and debris.
- Verify fan blade movement.
- Check voltage and feedback signals.
- Replace the condenser fan motor if necessary.
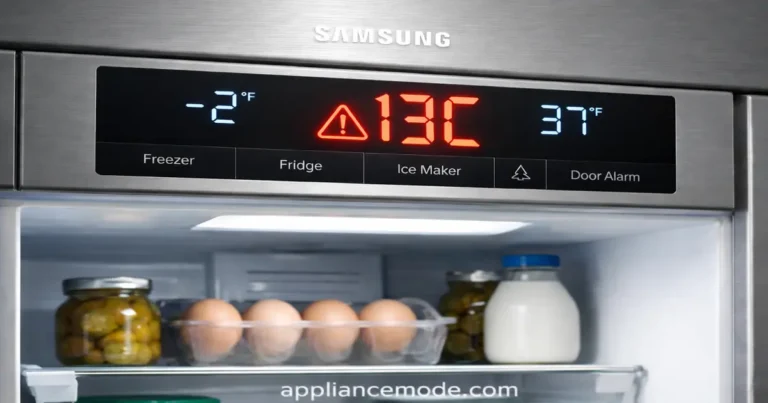
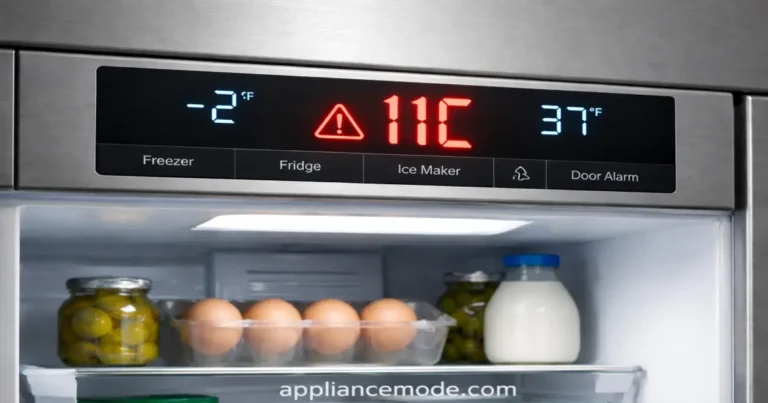
High Temperature Alarm Icon
Many Beko refrigerators also display a High Temperature Alarm icon. Unlike error codes, this warning does not necessarily indicate a component failure. Instead, it alerts you that internal temperatures have exceeded safe food-storage levels.
Common Causes
- Power outage
- Door left open
- Heavy food loading
- Dirty condenser coils
- Failed fan motor
- Cooling system fault
How to Clear the Alarm
1. Press the Alarm-Off Button
This silences the audible warning but does not fix the underlying issue.
2. Allow Temperatures to Recover
After a power outage or prolonged door opening, the refrigerator may need several hours to return to normal operating temperatures.
3. Clean the Condenser Coils
Dirty condenser coils can significantly reduce cooling efficiency.
4. Check Door Seals
Inspect door gaskets for gaps, tears, or damage.
5. Verify Cooling Performance
If temperatures remain elevated after 6–8 hours, further diagnosis is required.
When to Call a Technician
Contact a qualified appliance repair technician if you notice:
- The refrigerator is not cooling.
- The compressor runs continuously.
- Multiple error codes appear simultaneously.
- The high-temperature alarm returns repeatedly.
- You suspect a refrigerant leak or sealed-system problem.
Final Thoughts
Beko refrigerator error codes are valuable diagnostic tools that help pinpoint problems before they become major failures. Most sensor, fan, and defrost-related faults can be diagnosed quickly using a multimeter and basic troubleshooting procedures.
For complex repairs involving control boards, compressors, or sealed-system components, professional diagnosis is recommended to ensure a safe and lasting repair.

I am a master appliance repair technician with over 35 years of experience in the field. I am passionate about helping people troubleshoot their appliances and fix common problems. My website, appliancemode.com, provides a wealth of information on troubleshooting common appliance issues and deciphering error codes. This website aims to empower people to tackle appliance repairs themselves and save money on service calls.

Thank’s for share