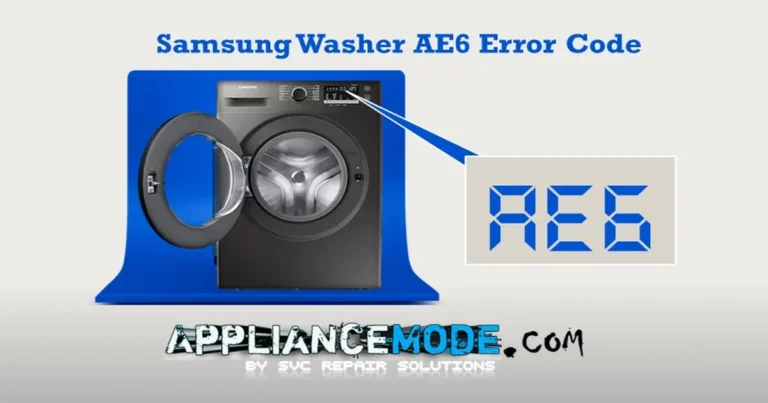

Candy Washing Machine Error Codes
In this guide, we’ll explain the most common Candy washing machine error codes, what they mean, their likely causes, and the troubleshooting steps you can take to resolve them. Candy washers use built-in diagnostics to identify problems with water filling, drainage, door locking, heating, motor operation, sensors, and electronic controls.
Understanding Candy Washing Machine Error Codes
Error 1 or E01: Door Lock Malfunction
This error indicates that your washing machine is unable to properly close and lock the door, preventing the cycle from starting.
- Potential Causes:
- Damaged door hook or latch.
- Faulty door lock mechanism.
- Problem with the main control board (PCB).
- Loose or damaged wiring connected to the door lock.
- Troubleshooting Steps:
- Inspect the Door: Ensure nothing is obstructing the door from closing fully. Check the door hook and the latch on the machine’s body for any visible damage.
- Check Wiring: With the machine unplugged, gently check the wiring harness connecting to the door lock for any looseness or damage.
- Test the Door Lock: While unplugged, you can try to manually operate the door lock mechanism (if accessible and safe to do so) to see if it moves freely. If it feels stiff or doesn’t engage, it might be faulty.
Error 2 or E02: Water Inlet Issue
Your washing machine isn’t filling with water within the expected time frame.
- Potential Causes:
- Closed water supply tap.
- Kinked or trapped water supply hose.
- Clogged water inlet valve filter screen.
- Faulty water inlet valve (solenoid valve).
- Frozen water supply (during cold weather).
- Damaged wiring harness.
- Troubleshooting Steps:
- Check Water Supply: Confirm that the water supply tap connected to your washing machine is fully open.
- Inspect Hoses: Ensure the water supply hose isn’t bent, kinked, or trapped behind the machine.
- Clean Inlet Filter: Turn off the water supply, disconnect the hose from the back of the machine, and clean the small mesh filter screen inside the water inlet valve. Debris can easily clog this.
- Solenoid Valve: If water flow is good but the machine still won’t fill, the inlet (solenoid) valve itself might be faulty. This typically requires replacement.
Error 3 or E03: Drainage Problem
The washing machine is unable to drain the water within the allotted time.
- Potential Causes:
- Clogged drain filter.
- Kinked or trapped drain hose.
- Clogged household drainage system.
- Faulty drain pump.
- Damaged wiring harness.
- Troubleshooting Steps:
- Clean Drain Filter: Locate and clean the drain pump filter, usually found at the bottom front of the machine behind a small access panel. Be prepared for some water to escape!
- Check Drain Hose: Ensure the drain hose isn’t bent, kinked, or pushed too far into the standpipe, creating a siphon effect.
- Verify House Drainage: If other drains in your home are slow, the issue might be with your general household plumbing.
- Drain Pump: If the filter and hose are clear, the drain pump itself might be faulty. You can sometimes hear if it’s attempting to run but failing to pump water. Checking its resistance with a multimeter (if you’re comfortable) can also diagnose this.
Error 4 or E04: Water Overfilling Detected
The washing machine has detected an incorrect water level, usually indicating overfilling.
- Potential Causes:
- Faulty water inlet valve (stuck open or leaking).
- Damaged or kinked pressure switch (APS) hose.
- Clogged or sudsy air chamber connected to the pressure switch.
- Faulty pressure switch (APS) assembly.
- Damaged wiring harness to the pressure switch.
- Troubleshooting Steps:
- Check Inlet Valve: If the machine fills even when it shouldn’t, the water inlet valve might be faulty and stuck open, allowing water to continuously flow.
- Inspect APS Hose: Locate the thin rubber hose connected to the pressure switch (often near the tub). Ensure it’s not kinked, blocked, or leaking air.
- Clean APS Air Chamber: Sometimes, excessive suds or debris can clog the air chamber that the pressure switch uses to detect water levels. Cleaning this can resolve the issue.
- Replace APS: If the hose and chamber are clear, the pressure switch (Analog Pressure Switch – APS) itself might need replacement.
Error 5 or E05: NTC Temperature Sensor Error
This error indicates a problem with the temperature sensor (NTC probe) that monitors water temperature.
- Potential Causes:
- Loose or damaged wiring connection to the NTC sensor.
- Faulty NTC probe (open or shorted circuit).
- Troubleshooting Steps:
- Check Wiring: With the machine unplugged, inspect the wiring connection between the NTC sensor (usually located near the heating element) and the main PCB.
- Test NTC Resistance (Advanced): If you have a multimeter, you can check the resistance of the NTC sensor. The values should be approximately:
- 25°C (77°F): ~19.5 kΩ
- 50°C (122°F): ~7.181 kΩ
- Significant deviations indicate a faulty sensor.
Error 6 or E06: Unbalanced Load
This common error occurs when the washing machine detects that the laundry load is unevenly distributed, leading to excessive vibrations during the spin cycle.
- Potential Causes:
- Improperly loaded clothes (e.g., a single heavy item, tangled laundry).
- Faulty EEPROM (memory chip on the main PCB).
- Troubleshooting Steps:
- Redistribute Laundry: Open the door and manually redistribute the clothes evenly inside the drum. Try to avoid washing single, heavy items like towels or jeans by themselves, or combine them with lighter items to balance the load.
- Run a Smaller Load: If you consistently get this error, try running smaller loads to see if the problem persists.
Error 7 or E07: Door Lock Blocked (During or After Cycle)
This error typically appears towards the end of a wash or dry cycle, leaving the door interlock blocked.
- To Open the Door: Unplug the machine from the wall socket for about 30 seconds, then plug it back in. This should reset the error and disarm the door lock, allowing you to open the door (the water should have drained by this point).
- Potential Causes:
- Damaged wiring harness.
- Faulty 3-phase motor (BLDC motor).
- Door lock assembly stuck in a closed position.
- Troubleshooting Steps:
- Check Door Lock & Wiring: After resetting as described above, carefully inspect the door lock mechanism and its associated wiring for any damage or signs of being stuck.
- Motor and Inductor: This error can also indicate issues with the motor or its associated inductor, such as “leakage from earth” (electrical leakage). This requires a professional to diagnose and potentially replace components.
- Motor Replacement: In severe cases, a faulty motor might need to be replaced.
Error 8 or E08 / Error 17 or E17: Motor Tachometer Error
These errors indicate a problem with the motor’s tachometer, which measures motor speed.
- Potential Causes:
- Damaged wiring harness to the tachometer.
- Faulty tachometer.
- Faulty TRIAC (motor control component).
- Foreign objects blocking motor or drum rotation.
- Troubleshooting Steps:
- Check Wiring: Inspect the wire connection between the tachometer (usually located on the motor) and the main PCB. Ensure connectors are not bent or loose.
- Clear Obstructions: Check inside the drum for any foreign objects or laundry that might be blocking the motor or drum rotation.
- Test Tachometer Resistance (Advanced): Use a multimeter to check the resistance of the tachometer. Expected values are:
- CESET tri-phase Motor tachometer: ~116 Ω
- WELLING Tri-Phase Motor tachometer: ~67 Ω
- Significant deviations suggest a faulty tachometer.
Error 9 or E09: Motor Control Component Error (TRIAC/IGBT)
This error points to a problem with the motor’s control component—either the TRIAC (for universal motors) or the IGBT/IPM (for BLDC motors).
- Potential Causes:
- Faulty motor TRIAC.
- Faulty motor IGBT (also known as IPM).
- Troubleshooting Steps:
- Check Tachometer First: Before considering main PCB replacement, ensure the motor tachometer is not short-circuited (refer to Error 8/17 troubleshooting). A shorted tachometer can damage the TRIAC/IGBT.
Error 11 or E11: Drying Sensor Error
This error applies to washer-dryer models and indicates an issue with the drying system’s temperature sensor.
- Potential Causes:
- Damaged wiring connection to the NTC sensor.
- Faulty safety thermostat.
- Faulty NTC sensor (for drying).
- Main PCB malfunction.
- Troubleshooting Steps:
- Check Wiring: Inspect the wiring connection between the drying NTC sensor and the main PCB.
- Check Safety Thermostats: Some drying systems have manual reset safety thermostats. Check if they have tripped and reset them if necessary (this can happen if a drying cycle was interrupted).
- Test Drying NTC Sensor: Using a multimeter, check the resistance of the drying NTC sensor. At 25°C, it should be approximately 48.5 kΩ.
Error 12 or E12: Drying System Malfunction
A general error indicating a problem with the overall drying system.
- Potential Causes:
- Damaged wiring to the drying heater, safety thermostat (TOC), or main PCB.
- Tripped manual reset safety thermostats.
- Faulty drying heater.
- Troubleshooting Steps:
- Check All Wiring: Carefully inspect all wiring connections related to the drying heater, safety thermostat (TOC), and the main PCB.
- Reset Safety Thermostats: Check for and reset any manual reset safety thermostats if they have tripped.
- Check Drying Heater: You can check the ohmic value of the drying heater with a multimeter to ensure it’s not open-circuited.
Error 13 or E13: User Interface Communication Error
This error indicates a problem with the communication between the user interface (control panel) board and the main control board.
- Potential Causes:
- Loose or damaged wiring connection between the user interface and main PCB.
- Faulty user interface board.
- Troubleshooting Steps:
- Check Wiring: Inspect the wire connection between the user interface board (behind the control panel) and the main PCB.
- User Interface Board: If the wiring is secure, the user interface board itself might be faulty and require replacement.
Error 15 or E15: Empty EEPROM Error
This error points to a problem with the EEPROM (Electrically Erasable Programmable Read-Only Memory) chip on the main PCB, which stores important operational data.
- Potential Causes:
- Corrupted EEPROM data.
- Faulty main PCB.
- Troubleshooting Steps:
- Unplug and Wait: Unplug the washer for an extended period (e.g., 30 minutes) to allow for a full power cycle and potential reset.
- Main Wash Heater NTC (Specific Models): In some cases, issues with the main wash heater NTC sensor can contribute to this error. Ensure it’s functioning correctly.
- Reprogramming/Replacement (Service Only): This error often requires reprogramming the main PCB or replacing it entirely. This is typically a task for authorized service technicians.
Error 18 or E18: Power Frequency Error
This error indicates an issue with the incoming power supply’s frequency.
- Potential Causes:
- Unstable or incorrect power supply frequency.
- Troubleshooting Steps:
- Check Power Supply: Verify that your home’s power supply voltage and frequency are stable and within the specifications for your washing machine. You might need an electrician to check this if you suspect an issue.
Error 19 or E19: NFC Tag Error
This error is specific to models with NFC (Near Field Communication) capabilities, usually for smart features or diagnostics via a smartphone.
- Potential Causes:
- Faulty NFC module.
- Incorrect NFC settings on your smartphone.
- Faulty user interface board.
- Troubleshooting Steps:
- Check NFC Module: If accessible, inspect the NFC module for any visible damage or loose connections.
- Review Smartphone Settings: Ensure NFC is enabled on your smartphone and that you are using the correct Candy app and following the instructions for NFC communication.
Error 20 or E20 / Error 21 or E21: APS (Analog Pressure Switch) Error
These errors indicate a problem with the analog pressure switch, which helps detect water levels and drainage.
- Potential Causes:
- Loose or damaged wiring to the pressure switch.
- Foreign body in the drain pump impeller.
- Clogged drain filter.
- Partially obstructed plumbing.
- Bent or kinked drain tube.
- Faulty pressure switch (APS).
- Important Note: Before replacing the APS, always confirm that your appliance is draining correctly. Often, drainage issues can trigger these errors.
- Troubleshooting Steps:
- Check Drainage First: Ensure the drain pump filter is clean, the drain hose isn’t kinked, and there are no obvious blockages in your household plumbing that would prevent proper drainage.
- Check Wiring: Inspect the wire connection between the pressure switch and the main PCB.
- Check APS: If drainage is confirmed to be fine, the pressure switch (APS) itself might be faulty.
Error 22 or E22: Main Wash Heater Error
This error indicates a problem with the main washing heater, responsible for heating the water.
- Potential Causes:
- Loose or damaged wiring to the heater.
- Faulty heating element (open circuit or incorrect resistance).
- Troubleshooting Steps:
- Check Wiring: Inspect the wire connection between the heater and the main PCB.
- Test Heater Resistance (Advanced): Use a multimeter to check the ohmic value of the heater. It should be approximately 28 Ω. An open circuit (infinite resistance) or a significantly different value indicates a faulty heater.
Key LED Indicator: Child Lock Notification
If you see a key-symbol LED illuminated, it typically indicates that the Child Lock feature is active. This prevents accidental changes to settings or starting cycles.
- To Activate/Deactivate Child Lock: Press and hold the “TEMPERATURE SELECTION” and “SPIN SELECTION” buttons simultaneously for 3 seconds.
- Important: The exact button combination for child lock can vary between Candy washer models. Always refer to your specific Candy user manual for precise instructions.
Final Thought
Candy washing machine error codes are designed to quickly identify problems involving water supply, drainage, heating, door locking, motor operation, sensors, and electronic controls. Many issues can be resolved through routine maintenance such as cleaning filters and checking hoses, while persistent error codes often indicate a faulty component that requires testing or replacement.
I am an appliance repair technician with over 35 years of experience. I help people troubleshoot appliance problems, understand error codes, and fix common issues. On ApplianceMode.com, I share free guides and useful information to help people repair their appliances.