Dryer Maintenance: 3 Essential Services to Improve Performance and Prevent Repairs
Proper dryer maintenance is essential for keeping your appliance running efficiently, safely, and reliably. Regular maintenance helps extend the lifespan of your dryer, reduce energy consumption, and prevent costly breakdowns.
In this guide, we’ll cover the three most important dryer maintenance services every homeowner should perform: comprehensive dryer cleaning, dryer vent cleaning, and dryer vent repair or replacement. Following these maintenance practices can improve drying performance, lower utility bills, and reduce the risk of fire hazards.
DIY Dryer Maintenance Service #1: Comprehensive Dryer Cleaning
One of the most effective dryer maintenance tasks is performing a thorough cleaning of the dryer’s internal components. Over time, lint and debris accumulate inside the cabinet, restricting airflow and reducing efficiency.
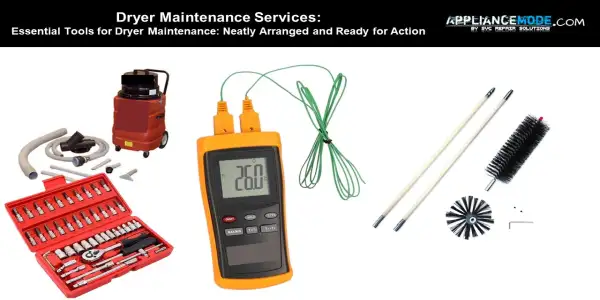
Tools You’ll Need
- Socket driver set
- Lint brush
- Vacuum cleaner
- Temperature gauge or thermometer
Dryer Cleaning Procedure
- Disconnect Power Unplug the dryer or disconnect the power supply before beginning any maintenance work.
- Access Internal Components Remove the lint filter and carefully disassemble the front panel to gain access to the drum and internal components.
- Clean Internal Parts Thoroughly remove lint and debris from:
- Lint filter housingDryer baseDrive motorBlower wheel assemblyHeating element housing
- Inspect Components Check the heating element, thermostat, wiring, rollers, belt, and other components for signs of wear, overheating, or damage. Replace defective parts as needed.
- Perform a Temperature Test Verify that the dryer reaches the manufacturer’s recommended operating temperature. Proper temperatures ensure efficient drying and help prevent overheating.
- Reassemble and Test Reinstall all panels, reconnect the power supply, and run a test cycle to confirm proper operation.
Maintenance Frequency
For optimal performance, perform this dryer maintenance service every 4 to 6 months or according to the manufacturer’s recommendations.
DIY Dryer Maintenance Service #2: Dryer Vent Cleaning
Dryer vent cleaning is one of the most important maintenance tasks for preventing overheating and reducing fire risks. Lint buildup inside the vent system restricts airflow, forcing the dryer to work harder.
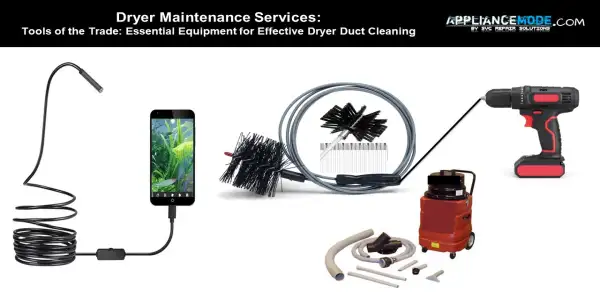
Tools You’ll Need
- Cordless drill
- Dryer vent cleaning brush kit
- Vacuum cleaner
- Optional borescope camera
Dryer Vent Cleaning Procedure
- Disconnect the Dryer Unplug the dryer and move it away from the wall to access the vent connection.
- Clean the Vent Duct Use a dryer vent brush attached to a cordless drill to remove accumulated lint and debris throughout the ductwork.
- Vacuum Remaining Debris Use a vacuum cleaner to remove loosened lint from both ends of the vent system.
- Inspect the Exterior Vent Check the outside vent cover for:
- Lint buildupBird nestsInsect infestationsDamper restrictions
- Optional Camera Inspection A borescope camera can help inspect hard-to-see areas inside the vent and confirm complete cleaning.
- Reconnect and Test Reconnect the dryer and run a test cycle to verify strong airflow at the exterior vent.
Maintenance Frequency
Experts recommend cleaning your dryer vent at least once per year. Homes with large families or frequent dryer usage may benefit from more frequent cleaning.
Benefits of Dryer Vent Cleaning
- Improved drying performance
- Lower energy costs
- Reduced drying times
- Extended dryer lifespan
- Reduced fire risk
DIY Dryer Maintenance Service #3: Dryer Vent Repair or Replacement
Damaged, crushed, or improperly installed dryer ducts can significantly affect performance and safety. Inspecting and repairing the vent system is a critical part of dryer maintenance.
Inspect the vent system.
Begin by determining whether the vent duct is:
- Easily accessible
- Hidden inside walls or ceilings
- Crushed or kinked
- Excessively long
Verify Code Compliance
Check local building codes regarding:
- Approved vent materials
- Maximum vent length
- Proper vent termination locations
Code-compliant installations improve airflow and safety.
Repair Minor Problems
Common issues include:
- Kinked flexible ducting
- Loose connections
- Air leaks
- Restricted airflow
Correcting these problems can improve dryer efficiency immediately.
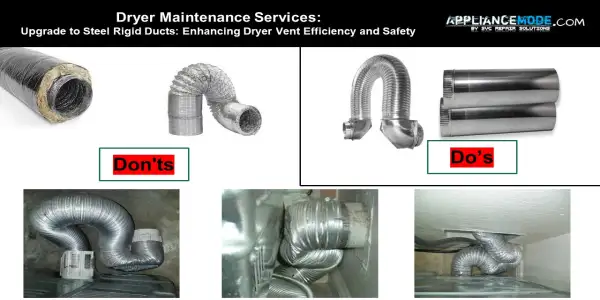
Replace Unsafe Duct Materials
If your dryer uses old plastic or thin foil venting, consider upgrading to galvanized steel rigid ductwork. Rigid metal ducts:
- Improve airflow
- Reduce lint accumulation
- Increase durability
- Meet modern safety standards
Benefits of Vent Repair and Replacement
- Improved airflow
- Faster drying times
- Lower utility bills
- Reduced fire hazards
- Increased appliance lifespan
Final Thought
Regular dryer maintenance is one of the best ways to keep your appliance operating safely and efficiently. By performing comprehensive dryer cleaning, routine dryer vent cleaning, and timely vent repairs or replacements, you can maximize performance, reduce energy costs, and avoid expensive repairs.
A proactive dryer maintenance schedule not only extends the life of your dryer but also helps protect your home from potential fire hazards caused by lint buildup and restricted airflow.

I am a master appliance repair technician with over 35 years of experience in the field. I am passionate about helping people troubleshoot their appliances and fix common problems. My website, appliancemode.com, provides a wealth of information on troubleshooting common appliance issues and deciphering error codes. This website aims to empower people to tackle appliance repairs themselves and save money on service calls.