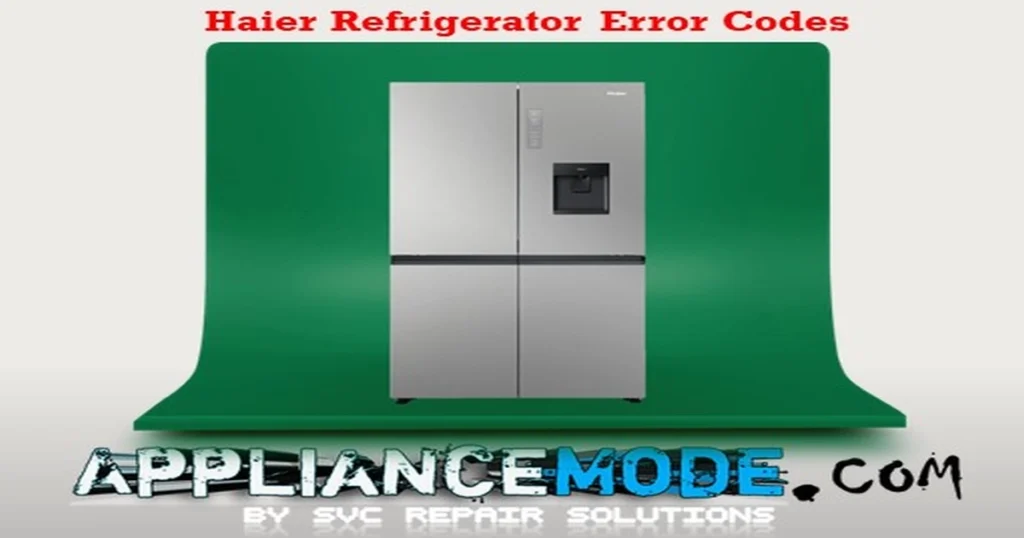
Dealing with a blinking or beeping refrigerator can be frustrating. Error codes are your refrigerator’s way of telling you something is wrong, and understanding them is the first step to getting your appliance back in working order. This guide breaks down common Haier refrigerator error codes, their potential causes, and steps you can take to troubleshoot the issue.

Important Safety Disclaimer: Please remember that troubleshooting and repairing appliances involves working with electricity and potentially delicate components. ALWAYS unplug your refrigerator before attempting any inspection or repair. If you are uncomfortable or unsure about any step, it is always best to contact a qualified appliance repair technician. Attempting repairs without the necessary knowledge can lead to further damage or personal injury.
Here’s a breakdown of common Haier refrigerator error codes:
Temperature Sensor Errors (F Codes & EH)
These codes typically indicate an issue with one of the refrigerator’s temperature sensors, which are crucial for monitoring and maintaining the correct temperatures in different compartments. An “open or shorted” sensor means it’s either not making a proper electrical connection or there’s an unintended connection.
- Causes (Common to most sensor errors):
- Loose or damaged wiring harness connecting the sensor to the control board.
- A faulty temperature sensor itself (open or shorted circuit).
- A faulty main PCB (Printed Circuit Board), which processes the sensor data.
- General Solutions for Sensor Errors:
- Check the Harness Connector: Ensure the wiring harness connecting the sensor is securely plugged in and that there are no visible signs of damage to the wires or connector.
- Test Sensor Resistance: You can test the resistance (measured in Ohms, Ω) of the sensor using a multimeter. Compare the reading to the expected values provided in the table below. If the resistance is significantly higher (indicating an open circuit) or very low (indicating a short circuit), the sensor is likely faulty and needs replacement.
- Inspect/Replace Main PCB: If the sensor and wiring appear fine, the issue might be with the main control board. This is a more complex step and often requires professional diagnosis and replacement.
Haier Refrigerator Sensor Temperature Chart (Reference Values):
| Electric Part Name | Temperature | Ohmic Value (Ω) | Notes |
|---|---|---|---|
| Defrost Sensor | 25°C / 77°F | 1,960 | Used in the defrost cycle |
| Ambient Sensor | 0°C / 32°F | 6,350 | Measures room temperature |
| Refrigerator Sensor | 0°C / 32°F | 6,350 | Measures temperature in the fridge compartment |
| Freezer Sensor | 0°C / 32°F | 6,480 | Measures temperature in the freezer compartment |
| Variable Temperature Sensor | 0°C / 32°F | 6,480 | Used in compartments with adjustable temps |
| Freezer Defrost Sensor | 0°C / 32°F | 6,480 | Used in the freezer defrost cycle |
| Main Sensor | 0°C / 32°F | 6,480 | Primary temperature sensor |
Specific Sensor Error Codes:
- F1: Refrigerator defrost sensor error.
- F2: Ambient temperature sensor error.
- F3: Refrigerator sensor error.
- F4: Freezer sensor error.
- F5: Variable temperature sensor error.
- F6: Freezer defrost sensor error.
- Fr: Main sensor error.
- EH: Temperature sensor error (This can be a general sensor error, often requiring checking multiple sensors or the main PCB.
Communication and Board Errors
These codes indicate problems with the electronic control system, often involving communication issues between the main control board and other components.
- E0: Display board failure communication.
- Causes: Damaged wiring harness between the main PCB and the display board, a faulty display board, or a faulty main PCB.
- Solutions: Check the harness connector. Inspect both the display board and the main PCB for visible damage. If the issue persists after checking connections and boards, it may be necessary to replace both the main PCB and the display board, as a fault in one can sometimes damage the other.
Fan Motor Errors (E1, E2, E6, E9)
These codes point to issues with the various fan motors within the refrigerator, which are responsible for circulating cold air.
- Causes (Common to most fan motor errors):
- A faulty fan motor itself.
- A faulty main PCB that is not supplying power or receiving feedback from the fan.
- Obstructions preventing the fan blades from spinning freely (ice buildup, debris).
- General Solutions for Fan Motor Errors:
- Check Voltage: Using a multimeter, check the voltage supplied to the fan motor connector on the main PCB. It should typically be within the 7V to 12V DC range. If there is no voltage (0V DC), the main PCB may be faulty.
- Check Fan Feedback Voltage: The main PCB also receives a feedback signal from the fan motor to confirm it’s running. Check this feedback voltage (refer to the table below for reference values). If it’s incorrect, the fan motor or the feedback circuit on the PCB could be the issue.
- Visual Inspection: After unplugging the refrigerator, visually inspect the fan blades. Ensure they are not blocked by ice buildup, dust, pet fur, or other debris. Gently try to spin the blades by hand; they should rotate freely without resistance or grinding noises.
Haier Refrigerator Fan Motor Voltage and Feedback (Reference Values):
| Electric Part Name | Main Voltage Value (DC) | Feedback Voltage Value (DC) | Location |
|---|---|---|---|
| Freezer Fan Motor | ~11.3 V | ~2.4 V | Typically located behind the freezer back panel |
| Condenser Fan Motor | ~11.3 V | ~2.4 V | Located near the compressor at the back/bottom |
| Refrigerator Fan Motor | ~11.3 V | ~2.4 V | Located in the refrigerator compartment, often near the top or back |
| Variable Temperature Fan Motor | ~11.3 V | ~2.4 V | Located in the variable temperature compartment |
Specific Fan Motor Error Codes:
- E1: Freezer fan motor error.
- E2: Condenser fan motor error.
- E6: Refrigerator fan motor error.
- E9: Variable temperature fan motor error.
Defrost System Errors (FD, RD, HD)
These codes indicate problems with the automatic defrost system, which prevents ice buildup on the evaporator coils. Issues can arise from the heater, thermofuse, or the control circuit.
- Causes (Common to most defrost errors):
- Damaged wiring harness in the defrost circuit.
- A faulty thermofuse (a safety device that opens the circuit if the temperature gets too high).
- A faulty defrost heater (which melts the ice). The heater circuit could be open (broken) or shorted.
- A faulty main PCB that isn’t activating the defrost cycle correctly.
- General Solutions for Defrost Errors:
- Check for AC Voltage: With the refrigerator plugged in (exercise extreme caution!), carefully check for approximately 220V AC voltage at the defrost heater connector on the main PCB when the system should be in a defrost cycle. If voltage is present but defrost isn’t happening, the heater or thermofuse is likely the issue. If no voltage is present, the main PCB or the circuit before it is the problem.
- Check Resistance of Heater and Thermofuse: UNPLUG THE REFRIGERATOR FIRST. Measure the resistance of the defrost heater and thermofuse together from the main PCB connector back to the power cord (this checks the entire circuit). If the resistance is very high (open circuit), you’ll need to access the heater and thermofuse behind the evaporator cover to test them individually.
- Individual Component Testing (after accessing evaporator):
- Defrost Heater: Measure the resistance of the heater. Compare it to the expected values (see table below). If it’s significantly off or open, replace the heater.
- Thermofuse: Measure the resistance across the thermofuse. It should read very low resistance (close to 0 Ω, indicating a closed circuit). If it reads infinite resistance (OL on a multimeter), the thermofuse is blown and needs replacement. Always replace the thermofuse if it’s open; there was a reason it blew, often related to a faulty heater or control issue.
- Enter Forced Defrost Mode: Some models allow you to manually initiate a defrost cycle. Consult your owner’s manual or a service manual for your specific model for instructions. If forced defrost doesn’t work, the main PCB may be faulty.
Haier Refrigerator Defrost Component Resistance (Reference Values):
| Electric Part Name | Ohmic Value (Ω) | Abnormal Value (Ω) | Notes |
|---|---|---|---|
| Heater for side-by-side fridge | ~270 | ||
| Heater for multi-door fridge | ~403 | Also often applies to refrigerator and variable temp. heaters | |
| Thermofuse | 0.1 – 1 | ∞ (OL) | Should be a closed circuit |
Specific Defrost Error Codes:
- FD: Freezer Defrosting Error.
- RD: Refrigerator Defrosting Error.
- HD: Refrigerator variable temperature defrosting error.
Door Switch Errors (DF, DR, DH)
These codes indicate a problem with the door switch for a specific compartment. The refrigerator’s control system uses door switches to know when a door is open or closed, affecting functions like lighting and fan operation.
- Causes (Common to most door switch errors):
- Damaged wiring harness connected to the door switch.
- A faulty door switch that is not correctly reporting its open or closed state.
- The door switch unit being loose or misaligned.
- General Solutions for Door Switch Errors:
- Check Door Switch Unit: Inspect the door switch to ensure it is securely mounted and that the refrigerator door is making proper contact with it when closed.
- Test Door Switch Resistance: UNPLUG THE REFRIGERATOR. Measure the resistance across the terminals of the door switch. The resistance reading should change depending on whether the door is open or closed (consult your service manual for specific open/closed resistance values, but typically a closed switch has very low resistance and an open switch has infinite resistance). If the switch doesn’t show the correct readings, replace it.
- Check Voltage at Main PCB (for DH – Variable Temp Door): Check the voltage of the variable temperature door switch at the main PCB connector. When the door is open, the voltage should be around 0V DC. When the door is closed, it should be around 5V DC. If these voltage readings are incorrect, the door switch or the main PCB input circuit could be faulty.
Specific Door Switch Error Codes:
- DF: Freezer door error.
- DR: Refrigerator door error.
- DH: Variable temperature door error.
Clearing Error Codes
In many cases, after fixing the underlying issue, the error code will clear automatically. However, some models may require a manual reset. Refer to your Haier refrigerator’s owner’s manual for specific instructions on clearing error codes. Often, simply unplugging the refrigerator for a few minutes and plugging it back in can reset the control system and clear temporary error codes.
When to Call a Professional
While this guide provides troubleshooting steps, some issues are complex and require the expertise of a qualified appliance repair technician. You should consider calling a professional if:
- You are uncomfortable performing any of the diagnostic or repair steps.
- You don’t have the necessary tools, such as a multimeter.
- You have followed the troubleshooting steps and the error persists.
By understanding these common Haier refrigerator error codes, you can be better equipped to diagnose problems and determine whether it’s a fix you can handle or if it’s time to call in the experts. Good luck!

I am a master Appliance Repair technician with over 35 years of experience in the field. I am passionate about helping people troubleshoot their appliances and fix common problems. My website, appliancemode.com, provides a wealth of information on troubleshooting common appliance issues and deciphering error codes. This website aims to empower people to tackle appliance repairs themselves and save money on service calls.


