
The LG dishwasher AE error code indicates a leak has been detected by the float switch. This safety feature shuts down the dishwasher to prevent water damage. Here’s a comprehensive guide to troubleshooting and resolving this issue:
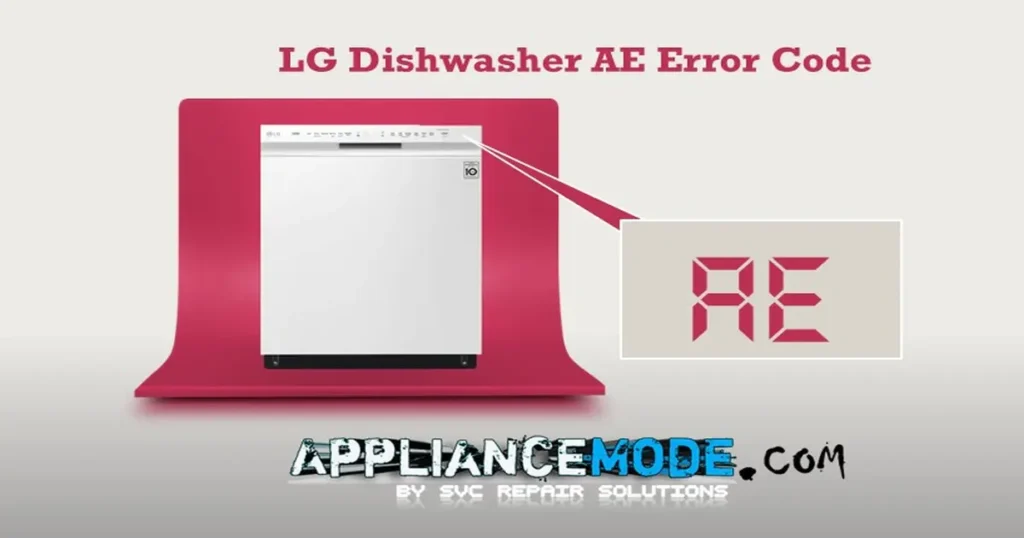
What the LG dishwasher AE error code means:
The float switch is a small device located at the bottom of the dishwasher. When water accumulates in the base pan (due to a leak), the float rises, activating the switch and triggering the AE error code (also displayed as E1 on some models).
Possible Causes:
- Leakage: Water might be leaking from various components inside the dishwasher.
- Loose or Faulty Connections: Hoses or wires might be loose or damaged.
- Component Issues: A faulty door seal, spray arms, safety switch, or water inlet valve could be causing the problem.
Troubleshooting Steps:
Follow these steps in order, starting with the simplest checks:
1. Leveling and Installation:
- Check Level: Ensure the dishwasher is perfectly level, both side-to-side and front-to-back. Even a slight tilt (as little as 3°) can cause water to pool and trigger the float switch. Use a level to verify.
- Mounting and Clearance: Confirm the dishwasher is properly installed with secure mounting brackets. Check for proper cabinet clearances; tight spaces can cause the tank to twist, leading to leaks.
2. Tank Bushings:
- Inspect Bushings: Check the bushings located at the bottom front corners of the tank. Ensure they are present and securely in place.
- Silicone Seal (Preventative): If the bushings have fallen out, apply a small amount of food-grade silicone to the rear of the bushing before reinstallation to prevent future dislodging.
3. Water Inlet Valve:
- Check for Constant Water Flow: Start a short cycle and observe if the water inlet valve shuts off correctly once the dishwasher is filled.
- Voltage and Mechanical Issues: If the valve stays open, determine if the voltage is constantly being supplied to the valve (electrical issue) or if the valve is mechanically stuck open.
- Calcium Buildup: If the valve is sticking, inspect the valve screen for calcium buildup, which can hinder proper closure. If found, consider using a water filtration system to prevent future buildup.
4. Door Gaskets:
- Lower Door Gasket: Inspect the lower door gasket for deformities, tears, or improper sealing. Clean any food debris or grease buildup from both the gasket and the corresponding area on the tank.
- Inner Door Gasket: Similarly, inspect the inner door gasket for damage and clean any debris.
5. Spray Arms:
- Check for Cracks: Remove both the upper and lower spray arms. Carefully inspect them for cracks, especially along the seams. Sometimes, twisting the arm is necessary to reveal hairline cracks. Cracked spray arms can direct water where it shouldn’t go, causing leaks.
6. Float Assembly:
- Empty and Inspect: Empty any water from the float assembly. Check for debris, insects, or anything that might be obstructing the float’s movement.
- Float Movement: Ensure the styrofoam float moves freely and doesn’t get stuck in any position.
- Float Switch Testing (Advanced):
- Resistance Test: Use a multimeter to check the resistance of the float switch. It should show no continuity (open circuit) when the float is down and a low resistance (0.2-0.3Ω) when the float is up (switch closed).
- Voltage Test: With the door open, there should be approximately 5VDC across the switch when it’s open and 0VDC when closed.
7. Door Panel and Additional Checks:
- Remove Outer Door Panel (If Necessary): If the above steps haven’t resolved the issue, you may need to remove the outer door panel (usually held by six screws).
- Inspect Bottom Door Gasket: Check the gasket at the bottom of the door for proper overlap with the tank, as well as any damage or debris.
- Gasket Between Fan and Door: Check the gasket between the fan and the door for defects.
- Lower Spray Arm Direction: Once again, check the lower spray arm for splits or damage that could cause it to spray directly towards the door.
By the way,
- Safety First: Disconnect power to the dishwasher before performing any internal inspections or repairs.
- Professional Help: If you are uncomfortable performing any of these checks, consult a qualified appliance repair technician.
By systematically following these steps, you should be able to identify and resolve the cause of the LG dishwasher AE error code.

I am a master Appliance Repair technician with over 35 years of experience in the field. I am passionate about helping people troubleshoot their appliances and fix common problems. My website, appliancemode.com, provides a wealth of information on troubleshooting common appliance issues and deciphering error codes. This website aims to empower people to tackle appliance repairs themselves and save money on service calls.