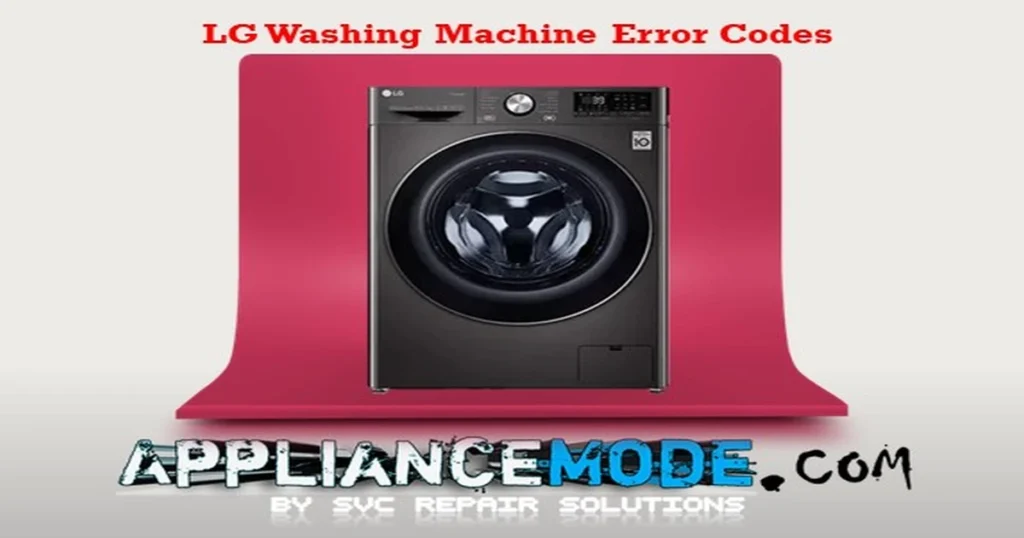
Your Comprehensive Guide to LG Washer Error Codes
This comprehensive guide will walk you through the most common LG washer error codes, explaining what they mean, their potential causes, and practical troubleshooting steps you can take yourself.

Whether you own a cutting-edge LG ThinQ Laundry model, a reliable LG top-loader with a direct drive motor, an innovative LG TWIN Wash, or a convenient SideKick pedestal washer, understanding these codes is the first step to getting your appliance back on track.
Before You Begin: Safety First!
- Always unplug the washer from the power outlet before attempting any inspection or repair.
- Turn off the water supply to the washer.
- Exercise caution when inspecting internal components. Sharp edges and electrical parts can be dangerous.
- If you are uncomfortable with any of the troubleshooting steps or if the issue persists, it’s always best to contact a qualified appliance repair technician.
Let’s dive into the codes!
LG Washer Error Codes Explained: Causes and Solutions
Here’s a breakdown of common LG washing machine error codes:
AE: Overflow or Leak Error
This critical safety error indicates that the washer’s internal leak detection system (often involving an Aqua Lock safety switch) has detected water where it shouldn’t be. This mechanism is designed to prevent flooding.
- Causes:
- Actual water leakage inside the machine.
- Damage or loose connection in the water inlet hose.
- A faulty Aqua Lock safety switch.
- DIY Solutions:
- Unplug the washer and turn off the water supply.
- Carefully inspect the area around and under the washer for visible leaks.
- Check the connections of the water inlet hoses at the back of the washer and the water taps. Ensure they are hand-tight.
- Inspect the hoses themselves for any cuts, cracks, or bulges.
- Examine the door seal (gasket) for any tears or debris that might be causing a leak.
- Locate and inspect the Aqua Lock device on the inlet hose (if present). Check for activation or damage.
- Carefully tilt the machine back slightly to see if water drains out from the base. If so, there’s an internal leak.
Cd: Cool Down Notification
This is not an error, but a notification that the drying cycle is complete and the washer is in a cool-down phase. The door will remain locked for safety during this time.
- Meaning: The wash/dry cycle has finished.
- Solution: Press any button on the control panel to end the cool-down and unlock the door. If no button is pressed, the door will automatically unlock after approximately 4 hours.
CL: Child Lock Notification
This indicates that the control panel is locked to prevent accidental use or program changes, especially by children.
- Meaning: The control panel is locked.
- Solution: Press and hold the button designated for the Child Lock function (often indicated by a lock icon) for approximately 3 seconds. You should hear a beep confirming deactivation.
- Important: The specific button for Child Lock can vary between LG models. Always consult your LG washer’s user manual to confirm the correct procedure for your specific model.
CE: Current Error
This error relates to the electrical current draw of the Direct Drive motor. The washer’s control system monitors the motor’s current to prevent damage or electrical trips.
- Causes:
- The motor is drawing excessive current (overloaded or shorted).
- A short circuit within the motor itself.
- A faulty Direct Drive motor.
- A problem with the main electronic control board.
- DIY Solutions:
- Unplug the washer.
- Try manually rotating the drum by hand with moderate force. It should turn relatively freely, although there might be some resistance due to the motor magnets. If it’s stiff, grinding, or won’t turn, there might be an issue with the drum bearing or motor.
dE (dE1, dE2, dE3, dE4): Door Lock Error
This is a common error indicating that the washer is having trouble detecting that the door is properly closed and locked, preventing the cycle from starting or continuing.
- Causes:
- The washer door is not fully closed.
- Something is obstructing the door from closing completely (e.g., laundry item stuck).
- The Start/Pause button was pressed before the door was securely closed.
- A problem with the door lock mechanism itself.
- Issues with the wiring harness connection to the door lock.
- A fault on the main electronic control board.
- DIY Solutions:
- Open the door and close it firmly, ensuring you hear a distinct click.
- Check for any clothing or foreign objects caught between the door and the door frame/seal.
- Reduce the load size if the drum is excessively full, as this can push against the door. LG recommends filling the drum to about 75-80% capacity.
- Unplug the washer for a few minutes and then plug it back in to reset the control panel.
dO (d0): Lid Open Notification (TWINWash SideKick Pedestal)
This notification specifically applies to LG TWINWash models with a SideKick pedestal washer. It means the lid of the mini-washer is not properly closed.
- Meaning: The SideKick mini-washer lid is open or not secured.
- Solution: Pull the SideKick drawer out completely and ensure the lid is firmly closed. You should hear a click when it’s latched correctly.
dHE: Dry Heater Error (Washer-Dryer Combos)
This error indicates a problem with the heating system during the drying cycle, often related to overheating protection.
- Causes:
- Issues with the dry water inlet valve (used for cooling during drying).
- A faulty dry thermistor (temperature sensor).
- A problem with the drying fan or airflow.
- A faulty heating element for drying.
- Issues with the wiring harness.
- A fault on the main electronic control board.
- DIY Solutions:
- Ensure the cold water tap connected to the washer is fully open, as cold water is often used to cool components during the drying cycle.
- Check that the lint filter is clean.
- Ensure the exhaust vent (if applicable) is not blocked.
E7: Stacking Switch Error (TWINWash with SideKick)
This error indicates a communication problem between the main washer and the SideKick pedestal washer, which are designed to work together. The SideKick typically requires a “separation key” to be installed under the main washer for proper operation.
- Causes:
- The separation key is missing or not correctly installed.
- A faulty separation switch.
- A problem with the wiring harness connecting the units.
- A fault on the main electronic control board.
- DIY Solutions:
- Verify that the separation key is correctly installed under the main LG washer. Refer to your installation manual for the correct placement.
FE: Water Overfilling Error
This error occurs when the washer detects that it has filled with too much water. The drain pump is usually activated automatically to prevent flooding when this error occurs.
- Causes:
- A faulty water inlet valve that is not closing properly.
- A blockage or issue in the air chamber or pressure sensor hose (components that help the machine measure water level).
- A faulty pressure switch (water level sensor).
- A fault on the main electronic control board.
- DIY Solutions:
- Unplug the washer and turn off the water supply.
- Check the water inlet valves at the back of the machine to ensure they are not leaking water when the machine is off.
- If there is excess water in the drum, you can try running a “Spin Only” cycle to drain it (if the machine allows). If not, you may need to use the drain pump filter hose (usually located near the base) to manually drain the water into a shallow container.
- Check the detergent dispenser; sometimes, excessive foaming from too much detergent can interfere with the water level sensor. Clean the dispenser tray.
FF: Freezing Error
This error indicates that the temperature inside the washer tub has dropped below a safe level (usually around 1°C), likely due to the washer being in a very cold environment. The machine will not operate until the internal temperature rises.
- Causes:
- The washer is installed in an environment that is too cold (e.g., unheated garage, basement).
- A faulty thermistor (temperature sensor).
- A fault on the main electronic control board.
- DIY Solutions:
- Ensure the washer is located in an environment that meets the temperature guidelines specified in your user manual. Move the appliance if necessary.
- If the drum is frozen, you can try pouring about 3 liters of warm water (around 36°C, not hot) into the drum and letting it sit for 15 minutes to thaw any ice. Then, select a “Spin Only” cycle to drain the water. Repeat if necessary.
EE: EEPROM Error
This error points to an issue with the washer’s internal memory (EEPROM) located on the main electronic control board.
- Causes:
- Corruption of the data in the EEPROM.
- A faulty main electronic control board.
Note: This error almost always requires the replacement of the main control board. Contact a qualified technician.
IE: Water Inlet Valve Error
This error signifies that the washer is not receiving enough water, or the water is entering too slowly. The machine has a system to detect this and will stop the cycle if the required water level isn’t reached within a set time (usually 10 minutes).
- Causes:
- Water taps are not fully open.
- Water taps are frozen or clogged.
- The water inlet hoses are kinked, bent, or blocked.
- The inlet filters (located where the hoses connect to the machine) are clogged with sediment.
- The detergent dispenser is clogged, restricting water flow.
- A faulty water inlet valve assembly.
- A fault on the main electronic control board.
- DIY Solutions:
- Check that both hot and cold water taps connected to the washer are fully open.
- Inspect the water inlet hoses for any kinks, twists, or blockages. Ensure they are not pinched behind the machine.
- Turn off the water taps, disconnect the hoses from the back of the washer, and inspect the small metal filters inside the washer’s inlet ports. Clean them gently with a brush if they are clogged.
- Clean the detergent dispenser tray and the area where it slides into the machine.
- Ensure your household water pressure is adequate.
LE: Direct Drive Motor Locked Error
This error suggests a problem with the LG Direct Drive motor being unable to rotate freely or detecting an overload. The washer’s system monitors motor rotation and load to prevent damage.
- Causes:
- The drum is overloaded with laundry.
- The load is severely unbalanced or tangled.
- An object (like a coin or sock) is stuck between the drum and the tub.
- A faulty hall sensor (which detects motor speed and position).
- A problem with the Direct Drive motor itself (e.g., damaged stator or rotor magnets).
- A fault on the main electronic control board.
- DIY Solutions:
- Unplug the washer.
- Reduce the load size. Remove some items, especially if washing bulky items.
- Check if the laundry is tangled or packed too tightly. Redistribute the load evenly in the drum.
- Carefully inspect the drum and tub for any foreign objects that might be obstructing movement.
- Wait 30 minutes to allow the motor to cool down before attempting to restart the cycle.
OE: Draining Error
This error indicates that the washer is having trouble draining the water. The machine expects the water level to drop below a certain point within a specified time (usually 10 minutes) after the drain cycle begins.
- Causes:
- The drain hose is kinked, bent, or blocked.
- The drain hose standpipe (the pipe it empties into) is too high (should not exceed 1 meter or 39 inches from the floor).
- The drain pump filter is clogged with lint, coins, or other debris.
- A blockage in the drain pump itself or associated hoses (bellows).
- A faulty drain pump.
- A fault on the main electronic control board.
- DIY Solutions:
- Unplug the washer.
- Check the drain hose for any kinks, twists, or blockages behind the machine or where it enters the standpipe or utility sink.
- Ensure the end of the drain hose in the standpipe is not pushed in too far, which can cause a siphon effect.
- Locate the drain pump filter (usually behind a small panel at the bottom front of the washer). Place a shallow pan underneath, slowly open the filter cap to drain any water, and then completely remove the filter to clean out any lint, debris, or foreign objects. Refer to your manual for the exact location and procedure.
- Check that your household drain is not clogged.
PE: Water Level Sensor Error
This error indicates a problem with the system that measures the water level inside the drum, typically involving the pressure switch or its associated components.
- Causes:
- A problem with the pressure switch (water level sensor) itself.
- A blockage or leak in the air chamber or the small hose connecting it to the pressure switch. This system traps air as water fills, and the pressure change signals the water level.
- Excessive suds/foam interfering with the water level sensor.
- A fault on the main electronic control board.
- DIY Solutions:
- If there was excessive foam during the cycle, this might be the cause. Use less detergent in future washes.
- Unplug the washer. This error often requires checking internal components like the pressure switch or air chamber hose, which is best left to professionals.
PS (P5): Power Surge Error
This error indicates that the washer detected a problem with the incoming electrical power supply, likely an unstable voltage or a power surge. The machine stops to protect its components.
- Causes:
- An actual power surge or brownout in your home’s electrical supply.
- Unstable voltage from the power outlet.
- A potential short circuit within the washing machine.
- A fault on the main electronic control board.
- DIY Solutions:
- Unplug the washer for several minutes (10-15 minutes) to allow the control board to reset.
- Plug the washer back into a different electrical outlet on a different circuit if possible, to rule out an issue with the original outlet.
- Check your home’s circuit breaker panel to ensure no breakers have tripped.
SE: Tachometer Error
This error relates to the washer’s Direct Drive motor control system, specifically the tachometer or Hall sensor which provides feedback on the motor’s speed and position.
- Causes:
- A faulty connection in the wiring harness to the tachometer/Hall sensor.
- A faulty tachometer or Hall sensor itself.
- A fault on the main electronic control board.
Note: This error points to a problem with the motor’s feedback system, which requires technical knowledge to diagnose and repair or replace the sensor or main board.
tCL: Tub Clean Notification
This is a maintenance notification, not an error. It reminds you to run the ‘Tub Clean’ cycle to clean the inside of the washer drum and prevent mold, mildew, and odors.
- Meaning: It’s time to run the Tub Clean cycle.
- Solution: Run the dedicated ‘Tub Clean’ cycle. This cycle typically uses a higher water level and temperature. It’s recommended to run it with an empty drum and potentially add a washer cleaning product or a cup of baking soda to the drum before starting. The ‘tCL’ notification will disappear once the cycle is completed.
tE: Thermistor Error
This error indicates a problem with the temperature sensor (thermistor) that monitors the water temperature inside the tub, or an issue related to the heating system.
- Causes:
- A faulty thermistor.
- A problem with the heating element.
- Issues with the wiring harness connected to the thermistor or heater.
- A fault on the main electronic control board.
- Technical Note: The thermistor is an NTC (Negative Temperature Coefficient) resistor, meaning its resistance decreases as temperature increases. A typical value is around 48.78 kΩ at 25°C (77°F). The heating element typically has a resistance of around 12 Ω at 120Vac or 40 Ω at 220Vac.
UE: Unbalance Error
This is a common error indicating that the laundry load inside the drum is unevenly distributed. The washer attempts to rebalance the load automatically, but if unsuccessful, it will display this error and may not spin properly or at all to prevent excessive vibration and damage.
- Causes:
- Laundry is tangled together (e.g., sheets, duvet covers).
- Washing a single bulky item (like a blanket or rug).
- Washing a very small load.
- The washer itself is not level on the floor.
- DIY Solutions:
- Open the door and manually redistribute the laundry inside the drum, ensuring it’s spread out evenly. Untangle any knotted items.
- If washing bulky items, consider adding a few towels of similar weight to help balance the load.
- If washing a very small load, the machine might struggle to balance. Consider adding a few more small items or washing it by hand.
- Check that the washer is level by using a spirit level on top of the machine. Adjust the leveling feet at the bottom corners of the washer if necessary. All four feet should be in firm contact with the floor.
VS (u5): Vibration Sensor Error
This error indicates a problem with the washer’s vibration sensor, a safety mechanism designed to detect excessive vibration (often caused by an unbalanced load or other issues) and potentially stop the machine to prevent damage.
- Causes:
- A faulty vibration sensor itself.
- A loose or damaged connection to the vibration sensor.
- DIY Solutions:
- Ensure the washer is properly leveled on the floor (as described in the UE error section).
- Check the connections to the vibration sensor on the back of the machine (you’ll need to access the rear panel). Ensure the connector is secure.
General Troubleshooting Tips
- Power Cycle: For many electronic glitches, unplugging the washer for 5-10 minutes can reset the control board and clear temporary errors.
- Check Water Supply: Ensure both hot and cold water taps are fully open and that there are no kinks in the hoses.
- Consult Your Manual: Your LG washer’s user manual is an invaluable resource. It provides model-specific information on error codes, features, and troubleshooting steps.
- Clean Filters: Regularly cleaning the drain pump filter and inlet filters can prevent many common issues.
Conclusion
Dealing with an LG washer error code can be frustrating, but by understanding what each code signifies, you can often identify the root cause and potentially resolve the issue yourself.
Remember to prioritize safety by always unplugging the machine and turning off the water supply before performing any checks. Follow the DIY solutions provided for common issues like drainage problems, unbalanced loads, or door lock errors.

I am a master Appliance Repair technician with over 35 years of experience in the field. I am passionate about helping people troubleshoot their appliances and fix common problems. My website, appliancemode.com, provides a wealth of information on troubleshooting common appliance issues and deciphering error codes. This website aims to empower people to tackle appliance repairs themselves and save money on service calls.


There is an icon that comes up under the rinse cycle. It is a circle with a line thru it. What does this mean?
I had the code 2E on my LG Direct Drive Washing Machine. What is that?