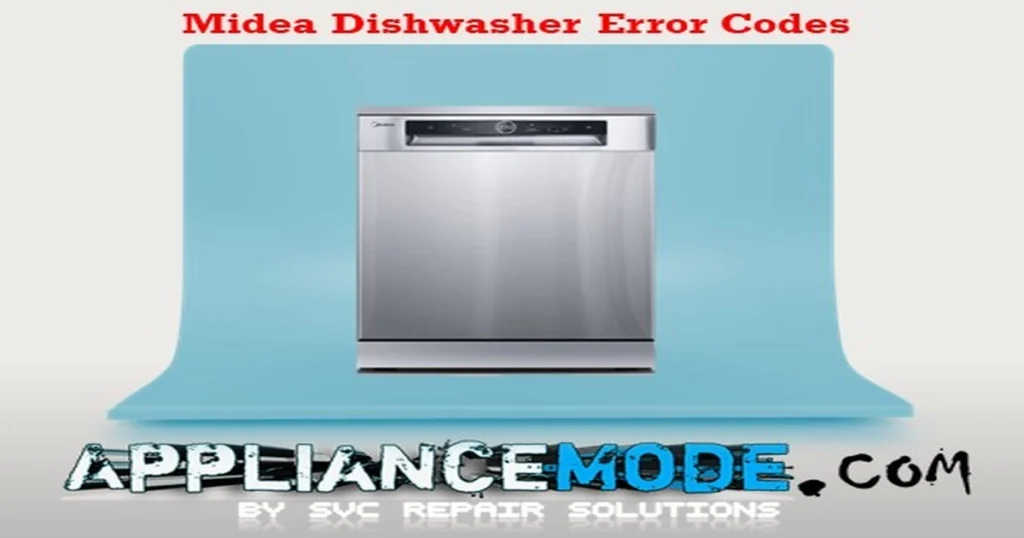
Don’t Let Error Codes Ruin Dishwashing Day! Your Guide to Midea Dishwasher Error Codes
Is your Midea dishwasher displaying a cryptic code instead of washing dishes? Don’t panic! This comprehensive guide is designed to help you understand common Midea dishwasher error codes, identify their likely causes, and walk you through effective troubleshooting steps to get your appliance back to its sparkling performance.

We’ll demystify common issues, from water filling problems to heating malfunctions, equipping you with the knowledge to tackle many fixes yourself.
Important Safety First!
Before attempting any troubleshooting or repair, always unplug your Midea dishwasher from the power outlet. Water and electricity are a dangerous combination. Exercise caution, and if you are uncomfortable or unsure about any step, it’s always best to contact a qualified appliance technician.
Where to Find Your Error Code:
Midea dishwasher error codes typically appear on the digital display panel on the front of the appliance. Note the code down before proceeding with troubleshooting.
Midea Dishwasher Error Codes Explained and How to Troubleshoot Them
Here’s a breakdown of common Midea error codes:
E1: Water Inlet Error
- Meaning: The dishwasher is not detecting sufficient water flow after 4 minutes of attempting to fill.
- When it appears: When the flow meter doesn’t register water after 4 minutes of the fill cycle.
- Possible Causes:
- The water supply tap is closed.
- Low water pressure (should ideally be within the range required by your model, often starting around 0.04 MPa, but checking your manual for the minimum is best; the original mentioned 1 MPa, which seems high for a minimum, but check your model’s specs).
- The water inlet hose is blocked, kinked, or frozen.
- Clogged filter in the inlet valve or hose connection.
- Faulty water inlet valve (solenoid).
- Faulty water flow meter (sometimes called a water-liter counter).
- Faulty main control board (PCB).
- Troubleshooting Steps:
- Check Water Supply: Ensure the water tap supplying the dishwasher is fully open.
- Check Water Pressure: Verify you have adequate water pressure in your home by testing another tap.
- Inspect Inlet Hose: Examine the fill hose for kinks or blockages. Ensure it’s not frozen if in a cold environment.
- Clean Inlet Filters: Unplug the dishwasher, turn off the water supply, disconnect the fill hose from the tap and the dishwasher, and clean any filters found at either end or within the inlet valve assembly.
- Test Inlet Valve (Advanced): With the power off, you can check the resistance of the water inlet solenoid valve using a multimeter.
- Expected Ohmic Value: 3–4.3 kΩ
- If the reading is significantly outside this range, the valve may be faulty.
- Test Flow Meter (Advanced): The flow meter uses a reed switch. You can often test its basic function by observing if the contact closes when a magnet is brought near it, simulating water flow. This requires accessing the component.
- Inspect Wiring: Check the wire harness connectors related to the inlet valve and flow meter for secure connections.
- Main PCB: If all other components check out, the issue could be the main control board, but this is less common and replacement should be a last resort, often requiring professional diagnosis.
E2: Drain Error
- Meaning: The dishwasher is having trouble draining water.
- Possible Causes:
- Clogged filters in the dishwasher base.
- Blocked drain hose or air gap.
- Sump blockage or foreign objects in the drain pump.
- Faulty drain pump motor.
- Faulty main control board (PCB).
- Troubleshooting Steps:
- Clean Filters: Thoroughly clean the filters located at the bottom of the dishwasher tub. Refer to your user manual for how to access them.
- Check Drain Hose: Inspect the drain hose for kinks or blockages. Ensure it’s properly connected to the sink drain or air gap and that the connection point is clear.
- Inspect Sump Area: Carefully check the sump area (under the filters) for foreign objects like broken glass or food debris.
- Test Drain Pump (Advanced):
- You can often test the drain pump motor by applying direct power safely (refer to service guides if available) or checking its resistance.
- Expected Ohmic Value: ~180 Ω
- If the resistance is incorrect or the pump doesn’t run when tested safely, the pump may be faulty.
- Inspect Wiring: Check the wire harness connection to the drain pump.
- Main PCB: If the pump is clear and testing correctly, the main board could be the issue.
E3: Heating Error
- Meaning: The dishwasher’s heating element is not adequately heating the water.
- When it appears: When the water temperature doesn’t reach the required level after a set time (e.g., 9 minutes).
- Possible Causes:
- Faulty wire harness connections to heating components.
- Faulty heating element.
- Faulty temperature sensors (NTC sensor – although separate errors exist for this, a completely failed one could contribute).
- Faulty safety thermostats (overheat protection).
- Insufficient water level (often due to issues with the water inlet or pressure switch).
- Faulty wash pump (if water isn’t circulating over the heater).
- Faulty main control board (PCB).
- Troubleshooting Steps:
- Inspect Wiring: Check wire harness connections to the heating element, thermostats, and temperature sensor.
- Check Heating Element (Advanced): Use a multimeter to check the resistance of the heating element.
- Expected Ohmic Value: ~29 Ω
- A reading significantly different or an open circuit (infinite resistance) indicates a faulty element.
- Check Safety Thermostats (Advanced): These are overheat protection switches. They should show continuity (very low resistance, close to 0 Ω) when cool.
- Expected Ohmic Value (when cool/closed): ~0.1 Ω
- If they show an open circuit (infinite resistance), they may have tripped or are faulty. (Note: The listed temperatures 209°F/445°F might relate to their trip points, not standard operating temperature checks).
- Check Water Level: Ensure the dishwasher is filling to the correct level during the wash cycle. Issues here could point back to E1 causes or the pressure switch.
- Check Wash Pump: Ensure the wash pump is running and circulating water effectively. A blockage or fault here can prevent proper heating.
- Main PCB: If heating components test okay, the control board could be the problem.
E4: Water Leakage Detected
- Meaning: The dishwasher has detected water in the base pan, triggering the anti-flood system.
- Possible Causes:
- A leak from hoses, connections, or internal components (pump seal, tub).
- Faulty anti-flood float switch in the base pan.
- Overfilling due to an inlet valve or pressure switch issue (less common for E4 specifically, but possible).
- Troubleshooting Steps:
- Locate the Leak: This is the most critical step. Carefully inspect the area around and under the dishwasher for signs of water. Open the kick panel if possible and look into the base pan using a flashlight.
- Check Hoses and Connections: Examine the fill hose, drain hose, and internal circulation hoses for cracks, loose clamps, or signs of dripping.
- Check Pump Seals: Inspect the seals around the wash pump and drain pump for leaks.
- Inspect Tub: Check the dishwasher tub itself for any cracks or damage (less common).
- Check Anti-Flood Switch: The anti-flood switch (usually a float on a base pan) should be dry and not activated. Ensure it’s not stuck in the ‘up’ position due to residual moisture or a mechanical fault. If it’s floating in water, you definitely have a leak to find.
- Repair or Replace: Once the source of the leak is found, the faulty hose, seal, or component must be repaired or replaced.
- Dry the Base Pan: After fixing the leak, you must remove the water from the base pan to reset the float switch and clear the error. This often involves tilting the machine carefully or using a towel/sponge to soak up the water.
E6: NTC Sensor Open Circuit Error
- Meaning: The dishwasher’s main control board is not receiving a temperature signal from the NTC sensor, indicating a broken connection or faulty sensor.
- Possible Causes:
- Faulty wire harness connection between the NTC sensor and the main board.
- Damaged NTC sensor wire.
- Faulty NTC sensor itself.
- Faulty main control board (less likely if E7 doesn’t also appear).
- Troubleshooting Steps:
- Inspect Wiring: Check the wire harness connection at both the NTC sensor and the main control board.
- Check NTC Sensor (Advanced): The NTC (Negative Temperature Coefficient) sensor’s resistance changes predictably with temperature. Use a multimeter to check its resistance. The value will vary based on the water temperature in the tub.
- Expected Ohmic Value (at approximately 77°F / 25°C): ~10 kΩ (10,000 Ω)
- An open circuit (infinite resistance) indicates a faulty sensor or broken wire.
- Trace Wiring: Check the wiring itself for breaks or damage.
- Replace NTC Sensor: If the resistance is incorrect or infinite, replace the sensor.
- Main PCB: If the sensor and wiring check out, the main board could be the issue.
E7: NTC Sensor Short Circuit Error
- Meaning: The dishwasher’s main control board is receiving an incorrect temperature signal from the NTC sensor, indicating a short circuit or faulty sensor.
- Possible Causes:
- Faulty wire harness (short circuit, wires touching).
- Faulty NTC sensor itself (internal short).
- Moisture around the sensor or connector causing a short.
- Faulty main control board (less likely if E6 doesn’t also appear).
- Troubleshooting Steps:
- Inspect Wiring: Check the wire harness for pinched wires or areas where insulation might be damaged, causing a short. Ensure the connector is dry.
- Check NTC Sensor (Advanced): Use a multimeter to check the resistance of the NTC sensor.
- Expected Ohmic Value (at approximately 122°F / 50°C): ~4.2 kΩ (4201 Ω)
- A resistance reading that is significantly lower than expected or zero resistance might indicate a shorted sensor. (Check the sensor’s resistance at room temperature as well, comparing it to the expected 10kΩ at 77°F from E6).
- Replace NTC Sensor: If the resistance value is incorrect at ambient temperature and changes unexpectedly with temperature changes (or reads zero/very low), replace the sensor.
- Main PCB: If the sensor and wiring appear fine, the main board could be the issue.
E8: Diverter Valve Error
- Meaning: The dishwasher is having trouble controlling the diverter valve, which directs water flow to different spray arms (upper, lower, or both).
- Possible Causes:
- Faulty wire harness connection to the diverter valve.
- Faulty diverter valve motor or mechanism.
- Faulty diverter valve microswitch (confirms position).
- Obstruction preventing the valve from turning.
- Faulty main control board (PCB).
- Troubleshooting Steps:
- Inspect Wiring: Check the wire harness connector at the diverter valve assembly for secure and correct placement. Check for damaged wires.
- Check for Obstructions: With the power off, try to manually turn the diverter valve (if accessible) to see if it moves freely. There might be debris blocking it.
- Test Diverter Valve (Advanced): Testing the motor and microswitch of the diverter valve often requires specific knowledge and accessing the component, usually located near the wash pump. Resistance checks or voltage checks might be needed depending on the motor type.
- Replace Diverter Valve: If wiring is okay and the valve is stuck or components test faulty, replace the entire diverter valve assembly.
- Main PCB: As a last resort, consider the main board if the valve components are confirmed functional.
E9: Button Stuck or Shorted
- Meaning: The dishwasher’s control panel is detecting that a button or key has been continuously pressed for an extended period (e.g., over 30 seconds).
- Possible Causes:
- A button is physically stuck in the pressed position.
- Moisture or liquid spills on the control panel surface causing a short circuit between contacts.
- Faulty touch control panel or keypad.
- Faulty control board (the small board behind the display/buttons).
- Troubleshooting Steps:
- Power Cycle: Turn off the appliance at the power outlet for a few minutes, then turn it back on. This can sometimes clear temporary glitches.
- Check for Stuck Buttons: Visually inspect each button to ensure none are physically stuck down. Gently try pressing and releasing each button.
- Clean Control Panel: Ensure the control panel surface is clean and dry. Use a soft, dry cloth. If there were spills, gently clean with a slightly damp cloth (ensure power is OFF and panel is dry before restoring power).
- Check for Moisture: If the issue occurred after a spill, moisture might be trapped inside the panel. Allow ample time for it to dry out, potentially using a fan (with power OFF).
- Test Control Panel/Board (Advanced): If physical issues and moisture are ruled out, the control panel or the small board connected to it might be faulty. Testing often involves checking connections or replacing the panel/board assembly.
Ed: Communication Failure
- Meaning: The main control board and the display/control panel board are not communicating with each other.
- When it appears: When the display board doesn’t receive a signal from the main board (or vice-versa) for a set time (e.g., over 20 seconds).
- Possible Causes:
- Faulty wire harness connection between the main PCB and the control board.
- Damaged communication wires.
- Faulty display/control panel board.
- Faulty main control board (PCB).
- Troubleshooting Steps:
- Inspect Wire Harness: Check the ribbon cable or wire harness connecting the main board (usually at the bottom or back) to the control board (behind the front panel). Ensure it is securely plugged in at both ends and not damaged or pinched.
- Replace Control Board: Often, the control panel board is the more likely culprit if the wiring is secure and undamaged. Replacing this board (the one with the display and buttons) is a common step.
- Replace Main PCB: If replacing the control board doesn’t resolve the issue and wiring is confirmed good, the main control board could be faulty, but this is less common.
EC: BLDC Wash Pump Motor Error
- Meaning: There is an issue detected with the main wash pump motor, specifically a Brushless DC (BLDC) type motor.
- Possible Causes:
- Faulty wire harness connection to the BLDC wash pump motor.
- Obstruction in the wash pump impeller or housing.
- Faulty BLDC wash pump motor itself.
- Faulty inverter board (the component that controls the BLDC motor, sometimes separate from the main PCB).
- Faulty main control board (PCB).
- Troubleshooting Steps:
- Inspect Wiring: Check the wire harness connection to the BLDC wash pump motor. Ensure it’s secure.
- Check for Obstructions: With the power off, inspect the wash pump impeller area (usually accessible from inside the tub, under the filters) for any foreign objects that could be jamming the motor.
- Check Motor Windings (Advanced): Use a multimeter to check the resistance between the different windings of the BLDC motor.
- Expected Ohmic Value (between phases U, V, W): U to V = V to W = W to U = ~59 Ω
- The resistance should be relatively equal between all pairs. Significant differences or an open circuit indicate a motor fault.
- Check Inverter Board (Advanced): BLDC motors are controlled by an inverter board. This might be part of the main PCB or a separate component. Testing this board is complex and often requires professional tools/knowledge.
- Replace Components: If the motor windings test faulty, replace the wash pump motor. If the motor tests fine, the inverter board or main PCB is the likely issue, which usually requires professional service.
Conclusion
Understanding these common Midea dishwasher error codes is the first step in diagnosing and potentially fixing problems yourself. By following the troubleshooting steps outlined in this guide, starting with the simplest checks, you can often resolve the issue.

I am a master Appliance Repair technician with over 35 years of experience in the field. I am passionate about helping people troubleshoot their appliances and fix common problems. My website, appliancemode.com, provides a wealth of information on troubleshooting common appliance issues and deciphering error codes. This website aims to empower people to tackle appliance repairs themselves and save money on service calls.


