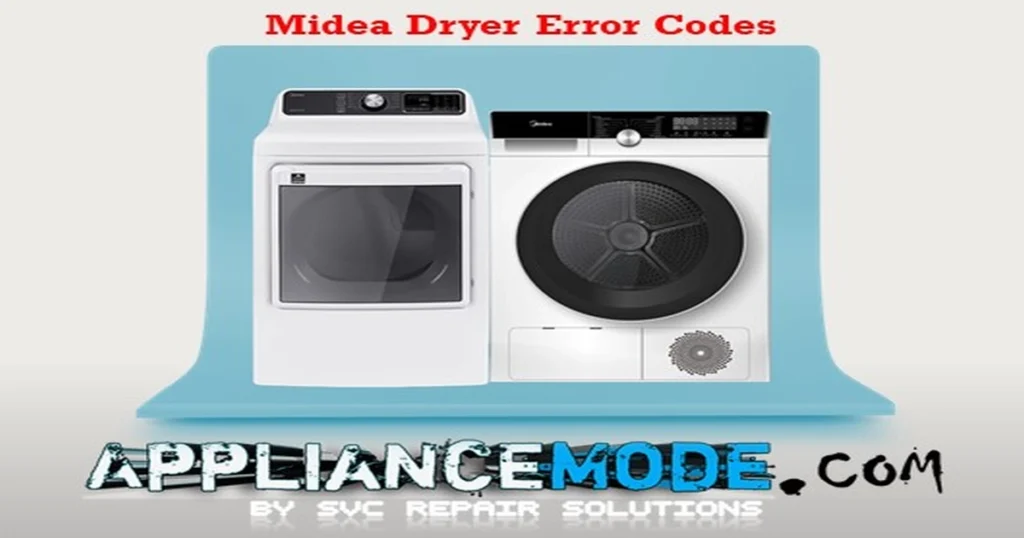
This comprehensive guide delves into prevalent Midea dryer error codes, explaining their likely causes and providing actionable solutions. From issues preventing your dryer from starting or running to problems with heating and effectively drying your clothes, we’ll cover the key information you need to get your appliance back in working order.

Important Safety Note: Before attempting any inspection or repair, always ensure the dryer is unplugged from the power outlet. Exercise caution when handling internal components and electrical connections.
Understanding Common Midea Dryer Error Codes and Their Solutions
Here’s a breakdown of frequently encountered error codes and how to address them:
E20: Water Full Warning
Description: This error code indicates that the dryer’s water reservoir is full and needs to be emptied. In condenser dryers, this reservoir collects water extracted from the clothes during the drying cycle. If the dryer is not draining properly, this error can also appear.
Possible Causes:
- Full water collection tank.
- Faulty drain pump (in models with a drain option).
- Issue with the water level sensor or float switch.
- Blockage in the drain hose or standpipe (if draining externally).
- Problem with the main control board.
Solutions:
- Empty the Water Tank: This is the most common cause. Locate and remove the water collection tank and empty the accumulated water.
- Check the Drain Hose (if applicable): If your dryer is connected to an external drain, ensure the hose is not kinked, blocked, or installed incorrectly (e.g., too high).
- Inspect the Drain Pump (if applicable): For dryers with a drain pump, check for any foreign objects that might be blocking the impeller. You can test the pump’s resistance with a multimeter. A typical ohmic value for a drain pump is around 250-800 Ω.
- Examine the Water Level Sensor/Float Switch: This component detects the water level in the tank or base. Ensure the float moves freely and the sensor is clean and properly connected. Test the sensor for proper operation according to your dryer’s service manual if possible.
- Check Wire Harness Connections: Inspect the wiring connected to the pump, water level sensor, and main control board for any loose or damaged wires.
- Consider the Main Control Board: If the above steps do not resolve the issue, the main control board might be faulty and require replacement.
E30: Heating Element Error
Description: An E30 error typically signifies a problem with the dryer’s heating system. The error is triggered when the drum temperature does not reach a sufficient level (e.g., less than 45°C) after the heating element has been activated for a set period (e.g., 10 minutes).
Possible Causes:
- Faulty heating element.
- Malfunctioning NTC (Negative Temperature Coefficient) sensor, which monitors temperature.
- Tripped or faulty thermal fuse or hi-limit thermostat, safety devices that prevent overheating.
- Loose or damaged wiring in the heating circuit.
- Problem with the main control board.
Solutions:
- Check Wire Harness Connections: Inspect all wiring related to the heating element, thermostats, and NTC sensor for looseness or damage.
- Test the Heating Element: Use a multimeter to check the resistance of the heating element. Typical resistance values can vary, but a primary heater might be around 26 Ω and a secondary heater around 68 Ω. An open circuit (infinite resistance) indicates a faulty element.
- Test the NTC Sensor: Measure the resistance of the NTC temperature sensor using a multimeter. The resistance of an NTC sensor changes with temperature. At 25°C, a common value is around 50 kΩ. Refer to your dryer’s service manual for the specific resistance curve or value at room temperature.
- Check the Thermostat/Thermal Fuse: These safety devices should have continuity (very low resistance, close to 0 Ω) when cool. If a thermal fuse shows infinite resistance, it has likely blown due to overheating and needs replacement. A hi-limit thermostat typically opens the circuit at a specific high temperature (e.g., 110°C / 230°F) and should reset when it cools down, showing low resistance. If it remains open when cool, it’s faulty.
- Reset the High-Limit Thermostat (if applicable and accessible): Some dryers have a resettable high-limit thermostat. If you can locate it (often a small button on the heating element housing), try pressing it. However, a tripped thermostat indicates an underlying heating issue that needs to be addressed.
- Inspect the Main Control Board: If all components in the heating circuit test correctly, the issue may lie with the main control board.
E32: Humidity Sensor Value Out-of-Range Error
Description: This error suggests a problem with the dryer’s humidity sensing system, which is crucial for detecting when clothes are dry and ending the cycle. The error occurs when the sensor provides a reading that is outside its expected operating range.
Possible Causes:
- Faulty humidity sensor.
- Lint buildup on the humidity sensor strips (usually located inside the drum).
- Issue with the wire harness connection to the sensor.
- Problem with the main control board.
Related Error Code: E4 (Moisture sensor failure) often indicates a similar issue.
Solutions:
- Clean the Humidity Sensors: Locate the metal sensor strips inside the dryer drum and clean them thoroughly with a soft cloth and rubbing alcohol. Lint and fabric softener residue can coat the sensors and prevent them from accurately detecting moisture.
- Check Wire Harness Connection: Inspect the wiring connecting the humidity sensor to the control board for any loose or damaged connections.
- Test the Humidity Sensor: Testing humidity sensors can be more complex than simple resistance checks. Consult your dryer’s service manual for specific testing procedures or resistance values. If testing is not feasible, and cleaning doesn’t help, the sensor may need replacement.
- Consider the Main Control Board: If the sensor is clean, the connections are secure, and the issue persists, the main control board might be the culprit.
E33: NTC Temperature Sensor Error
Description: An E33 error points to a fault with one of the dryer’s NTC temperature sensors. The error is triggered when the sensor circuit is detected as either open (broken wire or faulty sensor) or shorted (wires touching or faulty sensor).
Possible Causes:
- Faulty NTC thermistor (sensor).
- Loose or damaged wire connection to the NTC sensor.
- Problem with the main control board.
Related Error Codes: E3 (Front NTC sensor failure), E5 (Back NTC sensor failure) may indicate issues with specific temperature sensors.
Solutions:
- Check Wire Harness Connection: Inspect the wiring connected to the relevant NTC sensor for any loose, cut, or damaged wires.
- Test the NTC Sensor: Measure the resistance of the NTC sensor using a multimeter. Compare the reading to the expected value at room temperature (commonly around 50 kΩ at 25°C) as specified in your dryer’s service manual. If the resistance is significantly off or the circuit is open, the sensor is likely faulty and needs replacement.
- Inspect the Main Control Board: If the sensor and wiring appear to be in good condition, the issue might stem from the main control board’s ability to read the sensor’s signal.
E50: Motor Error
Description: An E50 error indicates a problem with the dryer’s motor or its control system. This error often occurs when the control board receives repeated error signals from the motor inverter, which controls the motor’s speed and direction.
Possible Causes:
- Faulty drive motor.
- Problem with the motor inverter board.
- Obstruction preventing the drum from turning freely.
- Broken or slipping drive belt.
- Loose or damaged wire connections between the motor, inverter, and main board.
- Faulty main control board.
Solutions:
- Check for Drum Obstructions: Ensure there are no foreign objects or excessive load in the drum that could be preventing it from rotating.
- Inspect the Drive Belt: Check if the drive belt is intact and properly tensioned around the motor pulley and drum.
- Examine Wire Harness Connections: Verify that all wiring between the motor, motor inverter board, and main control board is securely connected and undamaged.
- Test the Motor: Testing a dryer motor can be complex and may require specific knowledge of electrical components. In some cases, a simple resistance check might be possible, but often specialized testing is needed.
- Inspect and Potentially Replace the Inverter Board: The inverter board regulates power to the motor. If the motor itself is functioning correctly, the inverter board may be the source of the error.
- Consider the Main Control Board: If the motor and inverter board appear to be functioning, the main control board might be misinterpreting signals or have an internal fault.
E64: Inverter Motor Communication Error
Description: An E64 error signifies a communication problem between the main control board and the motor inverter board. These two components need to communicate effectively for the motor to operate correctly.
Possible Causes:
- Loose or damaged communication wires between the main board and the inverter board.
- Faulty motor inverter board.
- Faulty main control board.
Solutions:
- Check Communication Wire Harness: Carefully inspect the wiring loom connecting the main control board and the motor inverter board for any signs of damage, breaks, or loose connectors.
- Replace the Inverter Board: If the wiring is intact, the inverter board may not be communicating properly with the main board and might need to be replaced.
- Replace the Main Control Board: If replacing the inverter board does not resolve the issue, the problem could be with the communication circuitry on the main control board.
E80: Communication Between Display Board and Main Board
Description: An E80 error indicates a failure in the communication link between the dryer’s main control board (the brain) and the display board (the user interface). This prevents the user from selecting cycles or receiving accurate information.
Possible Causes:
- Broken or loose communication wire harness between the display and main boards.
- Faulty display board.
- Faulty main control board.
Solutions:
- Check Communication Wire Harness: Inspect the wiring harness connecting the display board to the main control board for any damage or loose connections.
- Replace the Display Board: If the wiring is secure, the display board itself might be faulty and unable to communicate with the main board.
- Replace the Main Control Board: If replacing the display board doesn’t fix the error, the main control board may be the component with the communication issue.
C9: EEPROM Error
Description: A C9 error suggests that the EEPROM (Electrically Erasable Programmable Read-Only Memory) on the main control board is corrupted or has an issue. The EEPROM stores crucial operational data and settings for the dryer.
Possible Causes:
- Data corruption within the EEPROM chip.
- Faulty main control board.
Solutions:
- Attempt a Hard Reset: Unplug the dryer for an extended period (e.g., 30 minutes or longer) to see if this clears the error and allows the EEPROM to reset.
- Replace the Main Control Board: If a hard reset does not resolve the C9 error, the EEPROM is likely permanently corrupted, and the entire main control board will need to be replaced.
Conclusion
While Midea dryer error codes can seem daunting, many can be diagnosed and resolved with careful observation and basic troubleshooting steps. By understanding the potential causes behind each code and following the suggested solutions, you can often get your dryer back to optimal performance.

I am a master Appliance Repair technician with over 35 years of experience in the field. I am passionate about helping people troubleshoot their appliances and fix common problems. My website, appliancemode.com, provides a wealth of information on troubleshooting common appliance issues and deciphering error codes. This website aims to empower people to tackle appliance repairs themselves and save money on service calls.


Help my dryer error code is E4
hi can you help me i have dryer model no MDG80CS the error code is FUL meaning with solutions pls
Your Midea dryer is showing a “FUL” error. This usually means the water container is full and needs to be emptied. It could also be a problem with the water pump or the sensor that detects the water level.