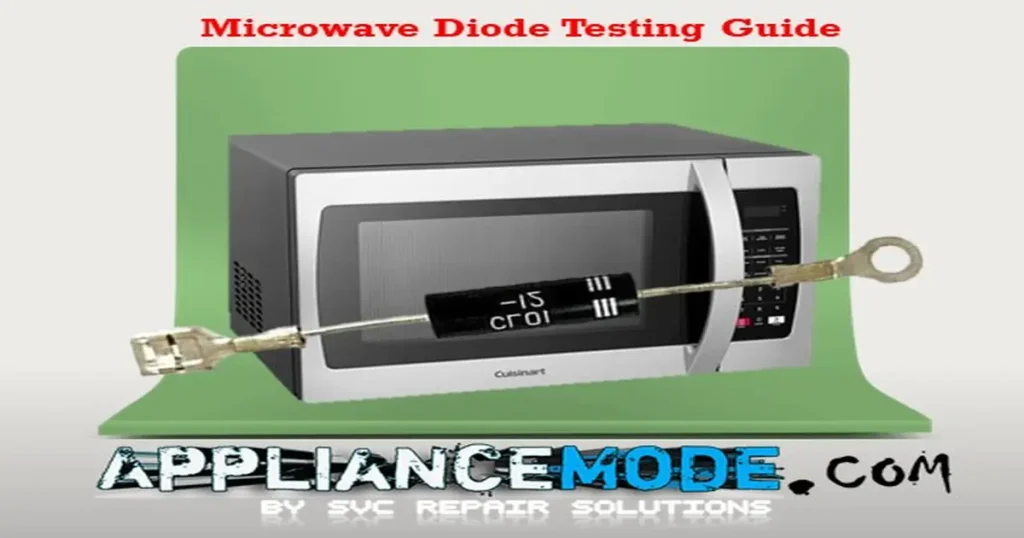
Testing a Microwave High-Voltage Diode
If your microwave runs but fails to heat food, a faulty high-voltage diode could be the cause. The high-voltage diode (also called a high-voltage rectifier) is a critical component in the microwave’s high-voltage circuit. Working together with the high-voltage capacitor, it converts and boosts the transformer’s output into the thousands of volts needed to power the magnetron—the component responsible for generating microwave energy.
Depending on the model, the magnetron typically requires between 2,000 and 4,800 volts DC to operate correctly. When the high-voltage diode fails, the magnetron may not receive the voltage it needs, resulting in little or no heating.
Fortunately, testing a microwave high-voltage diode is relatively simple. Using either an analog multimeter or a digital multimeter with a 9-volt battery, you can quickly determine whether the diode is functioning properly. This guide will walk you through both testing methods, explain how to interpret the results, and help you identify the common symptoms of a defective microwave diode.
Testing a Microwave High-Voltage Diode: Two Methods
Important Safety Note: Before attempting any repairs on your microwave, always ensure it’s unplugged and the high-voltage capacitor is completely discharged. You can find instructions for discharging the capacitor here: [link to capacitor discharge procedure].
The Tools:
- Analog Multimeter
- Digital Multimeter
Understanding the Methods:
This guide will explore two methods for testing a microwave high-voltage diode: using an analog multimeter and a digital multimeter. Both methods are effective, so choose the one you’re most comfortable with.
Method 1: Testing a Microwave High-Voltage Diode Using an Analog Multimeter
- Disconnect the power. Unplug the microwave from the outlet.
- Discharge the Capacitor: Safely discharge the high-voltage capacitor.
- Access the Diode: Carefully remove the lead that connects the diode to the capacitor. You can leave the ground connection attached.
- Set Up the Multimeter: Set your analog multimeter to the “ohms” function with a scale of R x 10,000 or higher.
- Testing a Microwave High-Voltage Diode in Forward Bias: Touch the positive meter probe to the diode’s cathode (usually marked with a band, stripe, or symbol) and the negative probe to the anode (often unmarked). A good diode will show some deflection on the meter.
- Test the Diode in Reverse Bias: Reverse the meter leads so the positive probe touches the anode and the negative probe touches the cathode. In this direction, the meter should show an “open circuit” or infinite resistance (represented by the infinity symbol “∞”).
- Interpreting the Results:
- Good Diode: Shows deflection in forward bias and infinite resistance in reverse bias.
- Shorted Diode: Shows deflection in both directions.
- Open Diode: Shows infinite resistance in both directions. In cases of a shorted or open diode, you’ll need to replace the component.
To learn how to do this, watch this video tutorial.
Method 2: Testing a Microwave High-Voltage Diode Using a Digital Multimeter
Preparation:
- Follow steps 1 and 2 from Method 1 (unplug the oven and discharge the capacitor).
- Carefully remove the lead connecting the diode to the capacitor.
Testing:
- Set Up:
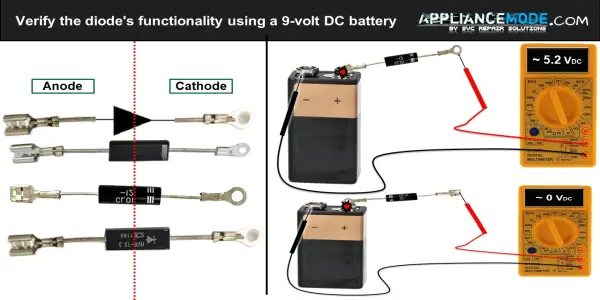
- You’ll need a 9-volt DC battery for this method.
- Set your digital multimeter to the DC voltage (VDC) setting at a range of 10 volts or higher.
- Testing a Microwave High-Voltage Diode
- Identify the diode’s anode (usually unmarked) and cathode (typically marked with a band, stripe, or arrow).
- Connect the positive lead from your multimeter (or the red lead) to the diode’s cathode.
- Connect the negative lead from your multimeter (or the black lead) to the negative terminal of the 9-volt battery.
- Connect the positive terminal of the 9-volt battery to the diode’s anode.
- A good diode will show a voltage reading (typically between 4 and 8.2 volts) on the multimeter.
- Reverse the leads:
- Disconnect the leads and swap them. Connect the positive lead from your multimeter to the diode’s anode and the negative lead to the cathode.
- You should see a reading of no voltage on the multimeter.
Interpretation:
- Good diode: voltage reading in one direction (cathode to anode) and no voltage in the other direction (anode to cathode).
- Shorted Diode: Voltage reading in both directions (anode to cathode and cathode to anode).
- Open Diode: No voltage reading in either direction.
Replacement: If the diode is shorted or open, replace it with the same type and specifications.
See how it’s done in this video!
Final thought
Testing a high-voltage diode with either an analog or digital multimeter is a straightforward process that can help you diagnose potential problems with your microwave.

I am a master appliance repair technician with over 35 years of experience in the field. I am passionate about helping people troubleshoot their appliances and fix common problems. My website, appliancemode.com, provides a wealth of information on troubleshooting common appliance issues and deciphering error codes. This website aims to empower people to tackle appliance repairs themselves and save money on service calls.