This guide will break down the most common Whirlpool oven error codes, explain what they mean, and provide actionable solutions to get your oven back in working order.

Important Safety Note: Always unplug your oven from the power source before attempting any repairs. Safety first!
Understanding Common Whirlpool Oven Error Codes and Their Solutions
Let’s dive into the specifics of those cryptic codes.
F1E0: EEPROM Communication Error
This code indicates a communication breakdown between the EEPROM (Electrically Erasable Programmable Read-Only Memory) and the main control board, causing the control to unexpectedly lock up.
Solution:
- Power Cycle: Disconnect power to the oven for 60 seconds. If the error code reappears, the main control board likely needs to be replaced.
F1E1: Upper RTD Uncalibrated Error & F1E2: Lower RTD Uncalibrated Error
These codes signal that the upper or lower RTD (Resistance Temperature Detector) is uncalibrated, leading to the main control locking up.
Solution:
- Power Cycle: Disconnect power to the oven for 60 seconds. If the error code reappears, the main control board likely needs to be replaced.
F1E5: Sensor Usage Out of Range Error & F1E7: PCB Thermistor Open or Shorted Error
These codes suggest an internal problem with a sensor value or a thermistor on the PCB (Printed Circuit Board) being open or shorted, causing the main control to lock up.
Solution:
- Power Cycle: Disconnect power to the oven for 60 seconds. If the error code reappears, the main control board likely needs to be replaced.
F1E9: Wide Queue, Full Error
This error indicates that the data bus is full, causing the main control to lock up.
Solution:
- Power Cycle: Disconnect power to the oven for 60 seconds. If the error code reappears, the main control board likely needs to be replaced.
F2E0: Keypad Disconnected Error
This means the main control board can’t detect the keypad.
Solutions:
- Check Connection: Inspect the keypad connection to the main control board and reconnect it if necessary. Plug in the oven and wait 60 seconds for the main control to identify the keypad.
- Inspect for Damage: If the error reappears, examine the keypad connector, cable, and main control board for any visible damage. Replace any damaged components.
- Replace User Interface Board: If the error persists, replace the user interface board.
- Replace Main Control Board: If the error still occurs, replace the main control board.
F2E1: Stuck Keypad Error & F2E2: Cancel or Off Keypad Error
These codes indicate that a button on the keypad has been pressed and held down for too long.
Solutions:
- Power Cycle: Turn off the power for 60 seconds. If the error reappears, try again.
- Reassemble User Interface: Disassemble and reassemble the user interface board (control panel).
- Replace User Interface Board: If the error occurs, replace the user interface board.
- Replace Main Control Board: If the error still occurs, replace the main control board.
- Replace User Interface Panel: If the error persists, replace the user interface panel.
F3E0: Upper Oven Temperature Sensor Error & F3E1: Lower Oven Temperature Sensor Open or Shorted
These codes signify that the main control has detected an open or short circuit in the oven temperature sensor.
Solutions:
- Check Wire Harness: Inspect the wire harness between the oven temperature sensor and the main control connector for loose connections or backed-out terminals. Reconnect or replace the harness as needed.
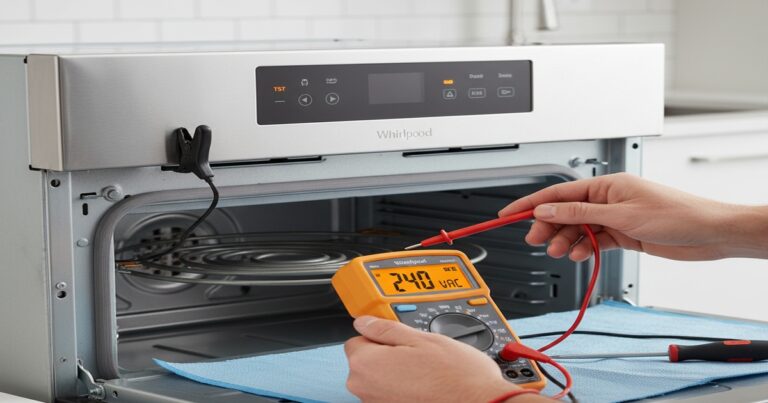
- Test Sensor Resistance: Test the resistance of the sensor at room temperature.
- Upper Oven Temperature Sensor (25°C | 77°F): 1000–1200 Ω
- Lower Oven Temperature Sensor (25°C | 77°F): 1000–1200 Ω
- If the resistance is out of range, replace the sensor.
- Recheck Connections: If the error persists, double-check the sensor wire harness and connections.
- Replace Main Control Board: If the error still occurs, replace the main control board.
F4E1: Magnetron Thermistor Error
This code means the microwave’s appliance manager has detected an open or short circuit in the magnetron’s thermistor circuit.
Solutions:
- Check Wire Harness: Check the wire harness between the magnetron thermistor and the microwave’s appliance manager connector for loose connections or backed-out terminals. Replace or reconnect the harness if found.
- Test Thermistor Resistance: Test the sensor’s resistance at room temperature.
- Magnetron Thermistor (25°C | 77°F): ~27.4 KΩ
- If the resistance is outside this range, replace the sensor.
- Recheck Connections: If the error persists, recheck the sensor wire harness and connections.
- Replace Microwave Appliance Manager: If the problem persists, replace the microwave’s appliance manager.
F4E4: Microwave Oven Humidity Sensor Error
This code indicates that the microwave’s appliance manager has detected an open or short circuit in the humidity sensor circuit.
Solutions:
- Check Wire Harness: Inspect the wire harness between the humidity sensor and the microwave’s appliance manager connector for loose connections or backed-out terminals. Replace or reconnect the harness if found.
- Test Sensor Resistance: Disconnect the connector and test the sensor’s resistance. The resistance between the humidity sensor pins should be consistent.
- Microwave Oven Humidity Sensor (25°C | 77°F): ~2.8 KΩ (between pins 1-2, 1-3, and 2-3)
- If the resistance is outside this range, replace the sensor.
- Recheck Connections: If the error persists, recheck the sensor wire harness and connections.
- Replace Microwave Appliance Manager: If the problem persists, replace the microwave’s appliance manager.
F5E0: Door Lock Error
This error appears when the main control detects that the door is locked when it should be unlocked.
Solutions:
- Check Door Lock Position: Verify the physical position of the door lock.
- Inspect Door: Look for any warping or misalignment of the oven door.
- Check Connections: Check for loose connections or terminal backouts at the main control connector and the latch motor.
- Test Wire Harness Continuity: Test the wire harness continuity between the main control and latch motor. If continuity is poor, replace the harness.
- Test Latch Motor Assembly: Test the latch motor assembly using an ohmmeter.
- Upper latch motor: 0.5–3 KΩ
- Lower latch motor: 0.5–3 KΩ
- Replace Main Board: If all else checks out, replace the main board.
F5E1: Latch Not Operating Error
This code indicates that the door latch isn’t locking or unlocking properly.
Solutions:
- Power Cycle & Verify Latch: Unplug the appliance for at least 30 seconds, then reconnect it. With the door closed, verify that the latch system repositions correctly (the motor should run).
- Check Wiring: Check the wiring connections to the door motor to ensure they are properly mounted, or replace them if damaged.
- Check Microswitch Functionality: Ensure the microswitch’s functionality is correct (the door switch should be open if the door is open, and the latch switch should be open if the door is unlocked).
- Ensure Wiring Fit: Ensure the wiring is fitted correctly, or replace it if necessary.
F6E0: Lost Communication with Microwave Error
This error appears when the main control no longer detects signals or communication from the microwave appliance manager.
Solutions:
- Check Microwave Power: Ensure the microwave board is powered. Open the microwave door to see if the light comes on.
- Inspect Microwave Harness: If the light doesn’t work, check the microwave harness.
- Check Board Connections: Check the connection between the connector on the oven Maxwell board and the wide interface board.
- Check Manager Connections: Check the connections between the wide interface board and the microwave appliance manager.
- Replace Wide Interface Board: If the light works and connections are good, replace the wide interface board.
- Replace Microwave Appliance Manager: If problems persist, replace the microwave appliance manager.
- Replace Main Board: If problems continue, check and replace the main board if necessary.
F6E2: Over-Temperature Clean Error
This code signifies that the oven’s temperature sensor is reading an out-of-range value, or the oven has overheated to 900°F (482°C) during a self-clean cycle.
Solutions:
- Inspect Main Control Connector: Inspect the main control connector for a backed-out terminal or loose connection. Reconnect or replace the harness if found.
- Measure Sensor Resistance: Measure resistance across the main control connector’s upper cavity and/or lower cavity.
- Upper Cavity (25°C | 77°F): 1000–1200 Ω
- Lower Cavity (25°C | 77°F): 1000–1200 Ω
- Check Thermal Limit & Heating Elements: Check the thermal limit (it might be stuck closed) and the heating elements.
- Lower Thermal Limiter: 0.1 – 1.2 Ω @ 150°C | 302°F
- Upper Thermal Limiter: 0.1 – 1.2 Ω @ 105°C | 221°F
- Lower bake element: 10 – 40 Ω
- Upper bake element: 10 – 40 Ω
- Lower broil element: 10 – 40 Ω
- Upper broil element: 10 – 40 Ω
- Upper convection element: 20 – 40 Ω
- Check Control Board Relay/TRIAC: Check if the control board RELAY/TRIAC is stuck in the closed position, causing the element to receive power when it shouldn’t. If so, replace the main board.
F8E0: Low Fan Speed Under Speed Error, F8E1: Low Fan Speed Overspeed Error, F8E2: High Fan Speed Under Speed Error, F8E3: High Fan Speed Overspeed Error
These codes indicate that the control board detects the cooling fan speed is either over or under the expected range.
Solutions:
- Inspect Wire Harness: Inspect the wire harness between the cooling fan and the microwave oven appliance manager connector for any damage or loose connections. Replace the harness if necessary.
- Check Cooling Fan Resistance: Check the resistance of the cooling fan using a multimeter.
- Cooling fan at low speed (“L. S”): 15 – 23 Ω
- Cooling fan at high speed (“H. S”): 15 – 23 Ω
- Check Control Board Relay/TRIAC: Check the control board RELAY/TRIAC to ensure it’s not stuck in a closed position, causing the fan to receive power when it shouldn’t. If it is, replace the main board.
- Replace Oven Appliance Manager: If the error persists, replace the oven appliance manager.
Conclusion
Whirlpool ovens are equipped with error codes to help diagnose issues. While these codes can pinpoint a malfunctioning component or system, remember that the first step in troubleshooting should always be to check the wire harness connections. Many times, a simple loose connection can be the cause of your woes, saving you time and money.
Ready to tackle your Whirlpool oven’s error code? Which code are you currently dealing with?

I am a master Appliance Repair technician with over 35 years of experience in the field. I am passionate about helping people troubleshoot their appliances and fix common problems. My website, appliancemode.com, provides a wealth of information on troubleshooting common appliance issues and deciphering error codes. This website aims to empower people to tackle appliance repairs themselves and save money on service calls.


