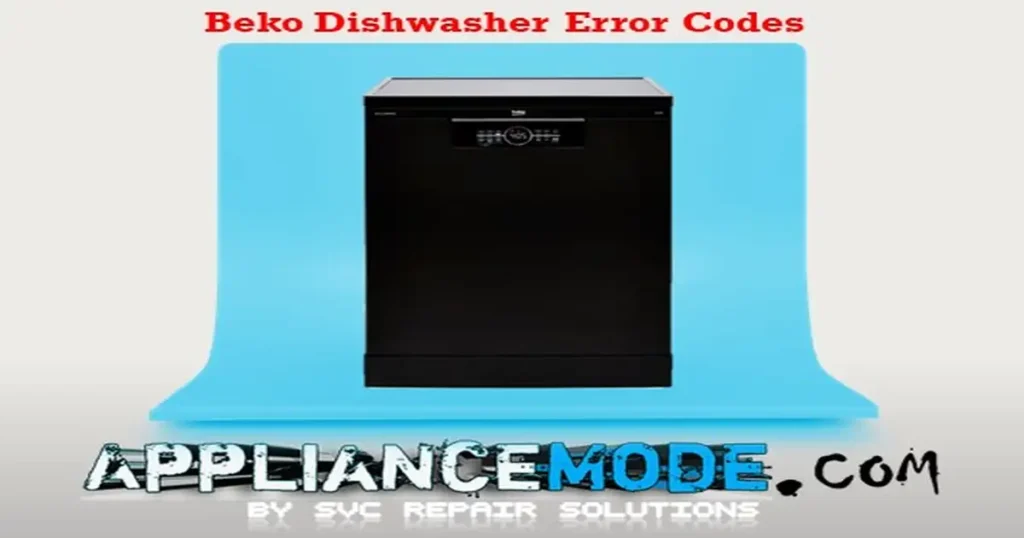
Beko Dishwasher Woes? Decode Those Error Codes Like a Pro!
A flashing error code on your Beko dishwasher can instantly turn a relaxed evening into a frustrating troubleshooting session. But what do those cryptic symbols actually mean? And more importantly, how can you fix them?
Fear not, home heroes! This comprehensive guide is your ultimate weapon against Beko dishwasher error codes. We’ve meticulously compiled and deciphered the most common error codes, offering clear explanations and actionable solutions to get your appliance sparkling again.

Before You Begin: Safety First!
Always prioritize safety. Before attempting any inspection or repair, unplug your Beko dishwasher from the power outlet. Exercise extreme caution and, if you’re ever unsure, don’t hesitate to call a qualified appliance technician.
Beko Dishwasher Error Codes Explained: Your Troubleshooting Toolkit
Let’s dive into the specifics of each error code. For many issues, a multimeter will be an invaluable tool to test component resistance.
E01: Overflow Error
This error indicates that your dishwasher has detected an overflow of water. The system will enter standby mode for 2 minutes, during which the drain pump automatically activates. If the overflow signal persists after this period, the E01 code (or “Call Service”) will appear, and the control board will become unresponsive except for the ON/OFF button.
Possible Causes:
- Damaged wire harness connector.
- Malfunctioning overflow float mechanism.
- Faulty overflow float switch contact.
- Flowmeter malfunction.
- Water inlet valve failing to shut off.
- Defective main PCB (Printed Circuit Board).
Solutions:
- Inspect the Overflow Level Gauge: Ensure it’s not stuck or obstructed.
- Locate and Repair Leaks: Identify the source of the water overflow. Repair the affected area and replace any damaged components as necessary.
- Verify Float Installation: Confirm the overflow float is correctly installed and moving freely.
- Test the Overflow Microswitch:
- Measure the resistance across the microswitch terminals.
- When the switch is “normal” (not triggered), you should see a very low resistance (approx. 0.1−1.0Ω).
- When “engaged” (triggered by an overflow), the resistance should be infinite (∞Ω or OL – Open Line).
- If these readings are reversed or incorrect, replace the microswitch.
- Check Water Inlet Valve: If the valve isn’t effectively stopping water flow, it needs to be replaced.
- Examine Main PCB: If all other checks fail, the main control board might be faulty and require replacement.
E02: No Water Error (or Insufficient Water)
Related Error Codes:
- E07: Water inlet valve error.
- E15: Flowmeter error.
This error indicates that the dishwasher isn’t detecting sufficient water intake. The flowmeter, which counts the liters of incoming water via electronic pulses, is monitored during the “Water Inlet” phase. If no pulses are detected by the main board, the E02 (or E07/E15 or “Call Service”) code appears. The dishwasher will pause operation until the water signal is detected or the error is resolved.
Possible Causes:
- Damaged wire harness connection.
- Clogged water valve filter screen.
- Faulty water inlet valve.
- Malfunctioning flowmeter.
- Defective main PCB.
Solutions:
- Check Wire Harness Connection: Ensure all connections are secure.
- Verify Water Tap: Make sure the water supply tap to the dishwasher is fully open.
- Clean Inlet Filter Screen: Sediment and debris can block water flow. Clean the filter screen on the water inlet valve thoroughly.
- Test Water Inlet Valve Resistance:
- Using a multimeter, measure the resistance of the water inlet valve.
- A healthy valve should have a resistance of approximately 3680Ω.
- Readings near 0.1−1.0Ω or infinite (∞Ω / OL) indicate a faulty valve that needs replacement.
- Inspect Flowmeter:
- Visually check the flowmeter’s turbine to ensure it spins freely and isn’t obstructed.
- Verify that the flowmeter’s reed switch is receiving 5V. If not, the main PCB may be faulty.
- Examine Main PCB: If other solutions don’t resolve the issue, the main control board might need replacement.
E03: Heating Error
The NTC (Negative Temperature Coefficient) sensor monitors the water temperature. If the temperature rises by less than 1°C within 3 minutes during the heating phase, the E03 error will trigger. The dishwasher will skip the heating phase and continue the program.
Solutions:
- Check Wire Harness and Connections: Ensure all connections related to the heating circuit are secure.
- Test Heater Thermostat Resistance:
- At 100°C, the heater thermostat should have a very low resistance (approx. 0.1−1.0Ω).
- An infinite resistance (∞Ω / OL) indicates a fault.
- Verify Thermal Fuse Protection:
- At 230°C, the thermal fuse protection should also show very low resistance (approx. 0.1−1.0Ω).
- An infinite resistance (∞Ω / OL) indicates a blown fuse.
- Check Heater Resistance:
- The heating element itself should have a resistance of approximately 30Ω.
- Readings near 0.1−1.0Ω or infinite (∞Ω / OL) suggest a faulty heater.
- Examine Main PCB: If the above components test as normal, the main PCB might be the culprit.
E04: Turbidity Sensor Error
Your dishwasher uses the turbidity sensor to determine the soil level of the water and adjust the wash cycle accordingly (auto-cycling). If the main board doesn’t receive appropriate data from the turbidity sensor, an E04 error occurs. When this fault appears, the auto cycle will typically run as if intensive dirt has been detected.
Solutions:
- Check Sensor Wire Harness Connector: Ensure a secure connection.
- Clean Turbidity Sensor: The sensor can become fouled with debris. Gently clean it.
- Replace Turbidity Sensor: If cleaning doesn’t resolve the issue, the sensor itself may be faulty.
- Replace Main PCB: If the error persists after replacing the sensor, the main control board might be to blame.
E05: 3-Way/Multi-Valve Error (Diverter Valve Error)
This error relates to the diverter valve, which is responsible for directing water flow to either the upper or lower spray arms. An E05 error appears if the dishwasher doesn’t receive the correct position signal from this valve.
Solutions:
- Check Diverter Wire Harness Connector: Ensure the connection is secure.
- Test Diverter Micro-Motor Resistance:
- Measure the resistance of the diverter micro-motor.
- It should be approximately 9200Ω.
- Readings near 0.1−1.0Ω or infinite (∞Ω / OL) indicate a faulty motor.
- Check Diverter Micro-Switch:
- When “engaged” (activated), the micro-switch should have very low resistance (approx. 0.1−1.0Ω).
- When “normal” (not activated), it should show infinite resistance (∞Ω / OL).
- Incorrect readings suggest a faulty switch.
- Examine Main PCB: If the diverter components are sound, the main PCB might be the issue.
E06: NTC Sensor Error
The NTC sensor measures the water temperature inside your dishwasher. An E06 error occurs if the control system detects an open circuit (no continuity) or a short circuit (unintended continuity) within the sensor.
Solutions:
- Check Sensor Wire Harness Connector: Ensure the connection is secure.
- Test Thermistor Resistance:
- Measure the resistance of the NTC sensor.
- At 20°C (room temperature), it should be approximately 60000Ω.
- Infinite resistance (∞Ω / OL) indicates an open circuit; near 0Ω indicates a short circuit. Replace the sensor if abnormal.
- Examine Main PCB: If the sensor tests fine, the main PCB might be faulty.
E08: External Board Communication Error
Related Error Codes:
- E09: Display board communication error.
- E10: Conductivity board communication error (The conductivity board helps adjust water hardness and prevent glass corrosion).
These errors indicate a loss of communication between the main control board and various other boards within the dishwasher.
- E08: Main board and external board communication failure.
- E09: Main board and display board communication failure.
- E10: Main board and conductivity board communication failure.
Solutions:
- Check Wire Harness Connections:
- Verify the connection between the external board and the main PCB.
- Verify the connection between the display board and the main PCB.
- Verify the connection between the conductivity board and the main PCB.
- Replace Boards (If Necessary):
- If connections are good, the respective external board, display board, or conductivity board might be faulty.
- Finally, if none of the above resolve the issue, the main board itself could be defective.
E11: Conducto Probe Open Circuit Error
Related Error Code:
- E12: Conducto probe short circuit error.
These errors indicate issues with the conductivity probe, which monitors water hardness.
Solutions:
- Check Probe Wire Harness Connector: Ensure a secure connection.
- Replace the Conductivity Probe: If the connection is good, the probe itself is likely faulty.
E13: Pressure Switch Error
If the dishwasher’s control system doesn’t detect the pressure switch in the “ON” position, despite having over 2.8 liters of water inside, an E13 error will occur. When this happens, the heating phase will be skipped, and the program will continue.
Solutions:
- Check Pressure Switch Wire Harness Connection: Ensure a secure connection.
- Replace the Pressure Switch: If the connection is good, the pressure switch is likely faulty.
- Replace Flowmeter (If Error Persists): In some cases, a faulty flowmeter can contribute to this error.
- Replace Main PCB (If Error Persists): As a last resort, the main control board might be the issue.
E14: Drain Filter Error
Related Error:
- E16: Drain pump error.
These errors indicate a problem with the dishwasher’s drainage system, either due to a clogged filter or a faulty drain pump.
Solutions:
- Clean the Filter: Thoroughly clean the dishwasher’s drain filter.
- Clear the Drain System: Check for any blockages in the drain hose or sink connection.
- Check Connectors: Ensure all electrical connectors to the drain pump are properly seated.
- Test Drain Pump Resistance:
- Conventional Drain Pump: Should have a resistance of approximately 180Ω.
- BLAC Drain Pump: Measure resistance between phases (U and V, V and W, W and U); each should be between 168−282Ω.
- Readings near 0.1−1.0Ω or infinite (∞Ω / OL) indicate a faulty pump.
- Replace Main PCB: If the pump tests fine but the issue persists, the main board may not be controlling it correctly.
E17: Automatic Detergent Dosage Position Error
Related Error Code:
- E18: Automatic Detergent Dosage Motor Continuous-Run Error.
These errors relate to the automatic detergent dispenser.
- E17: The sensor cannot confirm dosing, even after the expected dosing period.
- E18: The sensor (reed switch or optical rinse aid sensor) detects detergent dosing when it shouldn’t be happening.
Solutions:
- Check Wire Harness Connection: Ensure all connections to the dispenser are secure.
- Check/Replace Dosing Reed Switch: This sensor often confirms the dispenser’s position.
- Test Dosing Motor (Wax Motor) Resistance:
- Measure the resistance of the auto-dose wax motor.
- It should be approximately 2100Ω.
- Readings near 0.1−1.0Ω or infinite (∞Ω / OL) indicate a faulty motor.
- Replace Main PCB: If other components are working, the main board might be at fault.
E23: Circulation Pump Communication Error
Related Error Code:
- E24: Circulation Pump Error.
These errors indicate a problem with the dishwasher’s circulation pump, which sprays water during the wash cycle.
Solutions:
- Check Wire Connection: Verify the connection between the pump motor board and the main PCB.
- Test Motor Resistance:
- Measure the resistance between the phases of the circulation pump motor.
- It should be approximately 56Ω.
- Readings near 0.1−1.0Ω or infinite (∞Ω / OL) indicate a faulty motor.
- Check/Replace Pump Motor Board: If the motor tests fine, the dedicated pump motor control board might be faulty.
- Replace Main PCB: If the issue persists, the main board could be the cause.
B02: Sapphire Communication Error (Remote Control Board Communication Error)
This error indicates a communication breakdown with the remote control board, typically found in models with smart features or remote control capabilities.
Solutions:
- Check Wire Harness Connection: Verify the connection between the remote control board and the main PCB.
- Replace Remote Control Board: If the connection is secure, the remote control board itself is likely faulty.
- Replace Main PCB: If the error persists after replacing the remote control board, the main PCB might be the issue.
Beko Service Menu Functions: Diagnostic and Test Mode
The service menu is a powerful diagnostic tool that allows you to test various components and reset your appliance.
Before Accessing the Service Menu:
- Switch off the appliance.
- Close the dishwasher door.
How to Activate the Service Menu:
- Press and hold the “P+” and “ON/OFF” buttons simultaneously for 3 seconds.
- Release the buttons when you see a “3.2.1” countdown.
- All icons will light up, indicating successful entry into service mode.
Navigating the Service Menu:
- P+ button: Scrolls forward through the service menu functions.
- P- button: Scrolls backward through the service menu functions.
- Play/Pause button: Runs the selected service mode function.
- Delay button: Changes settings within a function.
Service Menu Functions Explained:
| Service Menu | Description |
|---|---|
| HFT | Automated Function Test: Primarily for production line testing. |
| IFT | Operator Function Test: Also primarily for production line testing. |
| SFT | Service Function Test: A comprehensive test cycle for service technicians. Press the “Play/Pause” button to start. The test will pause and wait for internal controls; you’ll need to press “Play/Pause” each time to continue. |
| EEP | Factory Reset (EEPROM): Resets all EEPROM values to factory defaults and clears all error codes from the control panel. Press “Play/Pause”; “rSt” will display to confirm the reset. |
| Dno | Showroom Function: Activates a display mode for showroom purposes. |
| mb | Main Board Software Version: Displays the software version of the main control board. |
| Db | Display Board Software Version: Displays the software version of the display board. |
| Bb | Button Board Software Version: Displays the software version of the button board. |
Exiting the Service Menu:
- Press and hold the “ON/OFF” button until the display counts down “3.2.1” and turns off.
By understanding these error codes and their solutions, you’re now better equipped to diagnose and potentially fix your Beko dishwasher, saving time, money, and hassle. Happy troubleshooting!

I am a master Appliance Repair technician with over 35 years of experience in the field. I am passionate about helping people troubleshoot their appliances and fix common problems. My website, appliancemode.com, provides a wealth of information on troubleshooting common appliance issues and deciphering error codes. This website aims to empower people to tackle appliance repairs themselves and save money on service calls.


