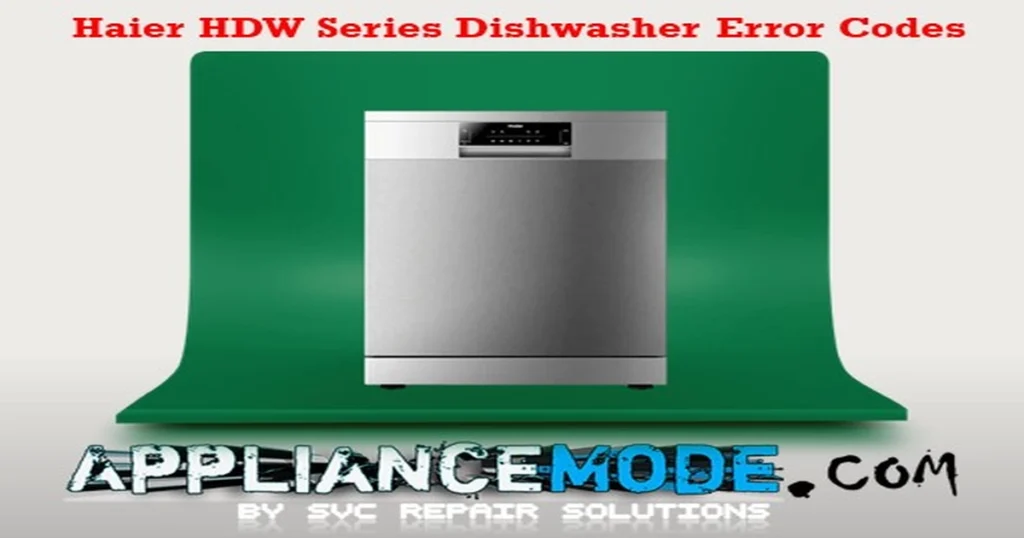
Troubleshoot Your Dishwasher: A Guide to Haier HDW Series Error Codes
Hey there! Is your Haier HDW Series dishwasher acting up and displaying a cryptic error code? Don’t panic! This blog post is your go-to guide for understanding what those mysterious codes mean, why they appear, and how you can troubleshoot them. Let’s get your dishwasher back in perfect working order.

Important Safety Note: Always unplug your dishwasher from the power outlet before attempting any inspection or repair. Exercise extreme caution when dealing with electrical components or water. If you are uncomfortable performing any of these steps, please consult a qualified appliance technician.
Haier HDW Series Dishwasher Error Codes Explained
Let’s break down the common error codes you might encounter and what steps you can take to address them.
E10: Water Inlet Valve Error (Also seen as A10)
This code indicates a problem with the dishwasher’s ability to fill with water during the initial phase.
- Related Error Codes:
- E11: Water tap closed (during the first fill).
- E12: Water tap closed (during a re-fill).
- Common Causes:
- The water tap supplying the dishwasher is turned off.
- Low water pressure from your household supply.
- The filter screen in the water inlet hose is blocked.
- The water inlet hose is kinked or bent, restricting flow.
- A faulty water inlet valve.
- A problem with the main control board (PCB).
- Troubleshooting Steps:
- Verify the water tap is fully open.
- Check if other taps in your home have normal water pressure.
- Turn off the water supply, disconnect the inlet hose from the tap and the dishwasher, and inspect/clean the filter screens on both ends.
- Ensure the water inlet hose is straight and not kinked.
- If comfortable and safe, check the resistance of the water inlet valve (refer to the Electrical Specifications table below).
- If the issue persists after checking the above, the main PCB may be faulty and require professional attention.
E20: Drainage Error (Also seen as A20)
This alarm signifies that the dishwasher is not draining water sufficiently or at all.
- Common Causes:
- A blockage in the drain pump filter or the drain hose.
- The drain pump itself is faulty or clogged.
- Damage to the drain pump’s wire harness or connector.
- A problem with the turbidity sensor (which can impact drain cycle timing).
- Failure of the main control board (PCB).
- Troubleshooting Steps:
- Turn off and unplug the dishwasher. Access and clean the drain pump filter at the bottom of the dishwasher cavity.
- Check the drain hose for any kinks or blockages. Disconnect it if necessary and clear any obstructions.
- Inspect the drain pump for visible debris. If comfortable and safe, you can check the resistance of the drain pump (refer to the Electrical Specifications table below) or test if it’s receiving power.
- Check the wire harness connection to the drain pump.
- Clean the turbidity sensor (usually located near the drain).
- If none of the above resolve the issue, the main PCB might be the culprit.
E30: Overflow Error (Also seen as F30)
This code indicates that the dishwasher has detected an excessive amount of water, potentially leading to a leak.
- Common Causes:
- A water leak from a component inside the dishwasher.
- A faulty water inlet valve that is not closing properly.
- A malfunctioning overflow protection mechanism (float switch).
- Problems with the wire harness connector.
- Failure of the main control board (PCB).
- Troubleshooting Steps:
- First, check for visible water leaks around or under the dishwasher. Try to identify the source.
- Inspect the water inlet valve to ensure it’s closing completely when the water supply is off.
- Locate the overflow protection float switch (usually in the base of the dishwasher). Check if it’s stuck or damaged.
- Examine the relevant wire harness connectors for damage or loose connections.
- If the leak source is identified, the faulty component will likely need replacement. If no leak is found or troubleshooting doesn’t resolve the issue, the main PCB might be faulty.
E40: Flowmeter Sensor Error (Also seen as F40)
This error relates to the dishwasher’s flowmeter, which measures the amount of water entering the machine.
- Related Error Codes:
- E41: Detection of a flow meter signal after the water load should have finished.
- E42: Flow rate detected is too high.
- Common Causes:
- Damage to the wire harness connected to the flowmeter.
- A faulty water inlet valve causing incorrect water flow.
- Problems with integrated air gaps.
- A faulty reed switch within the flowmeter.
- Failure of the main control board (PCB).
- Troubleshooting Steps:
- Check the wire harness connector for the flowmeter.
- Verify the water inlet valve is functioning correctly.
- Inspect the turbine within the flowmeter for obstructions or damage.
- If comfortable and safe, check the reed switch associated with the flowmeter.
- If the issue persists, the main PCB may be faulty.
E50: Communication Error (Also seen as F50)
This code indicates a problem with communication between different electronic components in the dishwasher.
- Related Error Codes:
- E51: Communication failure between the main PCB and the BLDC wash motor.
- E52: Communication failure between the main PCB and the user interface (UI) board.
- Common Causes:
- Damaged or loose wire harness connectors between the boards.
- A faulty wire harness in the dishwasher door.
- A faulty user interface (UI) control board.
- A faulty BLDC wash motor control board.
- Failure of the main control board (PCB).
- Troubleshooting Steps:
- Check and secure all wire harness connectors between the main PCB, UI board, and wash motor board.
- Inspect the wire harness that runs through the dishwasher door for damage (fraying, pinching).
- If comfortable and safe, inspect the UI board and the BLDC wash pump board for visible damage. These boards may need replacement.
- Ultimately, the main PCB could be the source of the communication failure.
E60: Heater Element Error (Also seen as F60)
This error typically relates to a problem with the dishwasher’s heating system, often when the water temperature isn’t increasing as expected.
- Common Causes:
- Faulty wiring harness connected to the heater element.
- A problem with the overheat protection thermostat(s) (high-limit switches).
- A faulty heater element itself.
- A problem with the wash motor or a blocked rotor preventing proper water circulation over the heater.
- Failure of the main control board (PCB).
- Troubleshooting Steps:
- Check the wire harness connection to the heater element.
- If comfortable and safe, check the resistance of the heater element (refer to the Electrical Specifications table below).
- If comfortable and safe, check the continuity and resistance of the overheat protection thermostats (refer to the Electrical Specifications table below).
- Check the wash motor for any obstructions preventing the impeller from turning freely.
- If the issue persists, the main PCB may be faulty.
E70: NTC Thermistor Error (Also seen as F70)
This code points to a problem with the NTC thermistor, the sensor that measures the water temperature.
- Common Causes:
- Faulty wire harness connector to the thermistor.
- A faulty NTC thermistor (which might be integrated with the turbidity sensor).
- Failure of the main control board (PCB).
- Troubleshooting Steps:
- Check and secure the wire harness connector to the thermistor/turbidity sensor.
- If comfortable and safe, check the resistance of the NTC thermistor at different temperatures (refer to the Electrical Specifications table below).
- If the thermistor tests correctly, the main PCB might be the issue.
E80: Turbidity Sensor Error (Also seen as F80)
This error indicates a problem with the turbidity sensor, which detects how dirty the water is to optimize the wash cycle.
- Related Error Codes:
- E81: Turbidity Sensor Calibration out of Range.
- E82: Turbidity Sensor Calibration without a Stable Signal.
- Common Causes:
- Damage to the wire harness connector.
- The turbidity sensor itself is dirty or has residue on it.
- A faulty turbidity sensor.
- Failure of the main control board (PCB).
- Troubleshooting Steps:
- Check and secure the wire harness connector to the turbidity sensor.
- Clean the turbidity sensor.
- If cleaning doesn’t help, the turbidity sensor may be faulty and require replacement.
- If the issue persists, the main PCB could be the problem.
EA0: Voltage Frequency Error (Also seen as FA0)
This code indicates a problem with the frequency of the electrical power being supplied to the dishwasher.
- Common Causes:
- The frequency of the input power supply does not match the dishwasher’s requirements (e.g., 50Hz vs. 60Hz in different regions).
- Failure of the main control board (PCB).
- Troubleshooting Steps:
- Verify the frequency of the power outlet the dishwasher is connected to matches the specification listed in your dishwasher’s manual. This usually requires an electrician or a specific meter.
- If the power supply frequency is correct, the main PCB is likely faulty.
EE0: Diverter Error (Also seen as FE0)
This error occurs if the dishwasher’s diverter motor, which directs water flow to the upper or lower spray arms, fails to reach the correct position within 30 seconds. When this error occurs, the heating phases are skipped, and the wash will be a cold cycle. The error is stored in the dishwasher’s memory (EEPROM).
- Common Causes:
- Faulty wire harness connector to the diverter motor or switch.
- A faulty diverter micro-motor.
- A faulty diverter micro-switch (which senses the motor’s position).
- Failure of the main control board (PCB).
- Troubleshooting Steps:
- Check and secure the wire harness connector for the diverter motor and micro-switch.
- If comfortable and safe, check the resistance of the diverter micro-motor (refer to the Electrical Specifications table below).
- If comfortable and safe, check the continuity of the diverter micro-switch in its different positions (refer to the Electrical Specifications table below).
- If these components test correctly, the main PCB might be faulty.
Lock Icon Lit Up: Child Lock Notification
This isn’t an error code indicating a malfunction, but rather that the child lock feature is active.
- Solution: To deactivate the child lock, press and hold the designated “lock icon” button on your control panel. Hold it for approximately 3 seconds, or until the lock icon LED turns off. The exact method can vary slightly between models, so always consult your dishwasher’s user manual for specific instructions.
Electrical Component Specifications (for reference)
For those comfortable with using a multimeter, here are some typical resistance values for key components in Haier HDW Series dishwashers. Always ensure the dishwasher is unplugged before testing components.
| Electric Part Name | Conditions | Ohmic Value (Ohm) |
|---|---|---|
| Water Inlet Valve | 3.2k ~ 4k | |
| Drain Pump | 160 ~ 195 | |
| Heater Assembly | ~ 30 | |
| High-limit (self-reset) | Temperature 100 °C | 0.1 ~ 1 |
| High-limit (self-reset) | Temperature > 101 °C | OL |
| High-limit (non-reset) | Temperature 205 °C | 0.1 ~ 1 |
| High-limit (non-reset) | Temperature > 206 °C | OL |
| BLDC wash motor (between U, V, W) | ~ 51 | |
| NTC Thermistor (Turbidity sensor) | Temperature 100 °C | 635 |
| NTC Thermistor (Turbidity sensor) | Temperature 25 °C | 10000 |
| Diverter micro-motor | 9k | |
| Diverter micro-switch | Position: IN | 0.1 ~ 1 |
| Diverter micro-switch | Position: OUT | OL |
Conclusion
Understanding these common Haier HDW Series dishwasher error codes can help you diagnose issues and potentially save you a service call. Remember to approach troubleshooting safely and systematically.

I am a master Appliance Repair technician with over 35 years of experience in the field. I am passionate about helping people troubleshoot their appliances and fix common problems. My website, appliancemode.com, provides a wealth of information on troubleshooting common appliance issues and deciphering error codes. This website aims to empower people to tackle appliance repairs themselves and save money on service calls.


Hey! Do you use Twitter? I’d like to follow you if that would be okay.
I’m undoubtedly enjoying your blog and look forward to new updates.