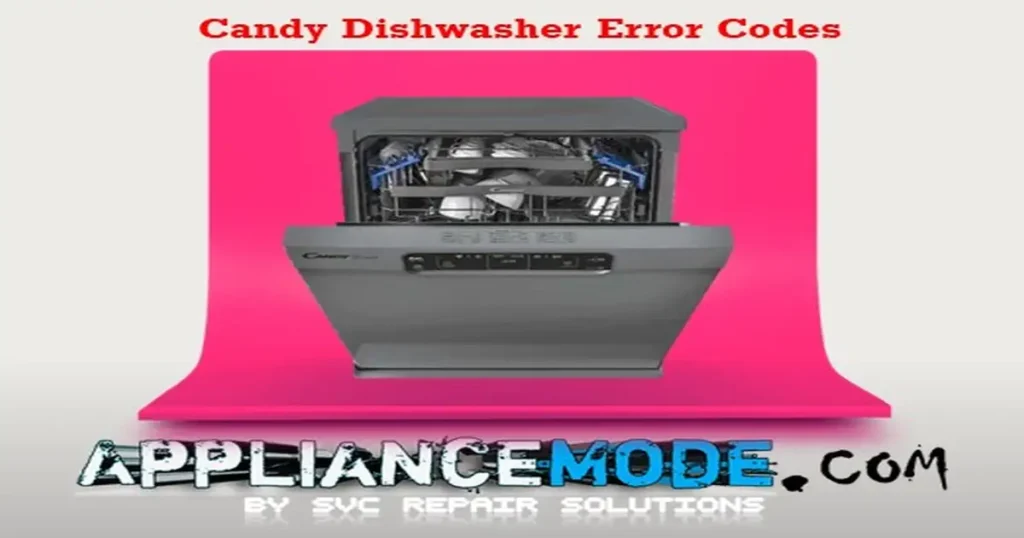
Decode Your Candy Dishwasher: A Comprehensive Guide to Error Codes and Easy Fixes
This comprehensive guide will explain common Candy dishwasher error codes and provide straightforward troubleshooting steps to help you get your appliance back to sparkling clean dishes in no time.

We understand how frustrating a malfunctioning appliance can be. That’s why we’ve put together this easy-to-follow resource, designed to empower you to diagnose and often resolve issues yourself.
Before You Begin: Safety First!
Always prioritize safety when working with appliances. Before attempting any repairs or troubleshooting, always unplug your dishwasher from the power outlet. Exercise caution and, if you’re unsure, it’s best to consult a qualified technician.
Understanding Candy Dishwasher Error Codes: Your Troubleshooting Companion
Let’s dive into the common error codes you might encounter and their solutions:
E:02 or E2: Water Solenoid Valve Error (Water Load Issue)
This error indicates that the dishwasher isn’t completing its water intake cycle.
Possible Causes:
- Closed Water Faucet: The most common and easiest fix!
- Low Water Pressure: Insufficient water flow into the machine.
- Bent or Clogged Fill Hose: Obstruction preventing water from reaching the dishwasher.
- Clogged Air Pressure Trap: Can interfere with proper water level detection.
- Faulty Connectors: Loose or corroded electrical connections to the inlet valve.
- Faulty Inlet Valve: The valve responsible for controlling water flow into the dishwasher might be defective.
- Faulty Main PCB: The main control board could be sending incorrect signals.
Troubleshooting Steps:
- Check Water Supply: Ensure the water faucet connected to the dishwasher is fully open and that your home’s water pressure is adequate.
- Inspect Fill Hose: Straighten any kinks in the fill hose and check for any visible clogs or debris. Consider disconnecting and cleaning the filter screen at the end of the hose where it connects to the water supply.
- Test Solenoid Valve:
- Locate the water inlet valve (often at the back or bottom of the dishwasher).
- Using a multimeter, measure the resistance across the terminals of the water inlet valve. A healthy reading should be approximately ~4060 Ω. If the reading is significantly different or shows an open circuit, the valve is likely faulty and needs replacement.
- Consider Main PCB: If all other checks are clear and the error persists, the main PCB might be the culprit. Replacement should be considered a last resort.
E:03 or E3: Drain Pump Error (Water Discharge Issue)
This error signals that the dishwasher is unable to drain water within the expected timeframe.
Possible Causes:
- Faulty Wire Harness: Damaged or loose wiring to the drain pump.
- Clogged Filter, Drain Hose, or Siphon: Obstructions preventing water from exiting the dishwasher.
- Faulty Drain Pump: The pump itself may be defective.
- Faulty Main PCB: Issues with the main control board’s drainage signals.
Troubleshooting Steps:
- Clear Obstructions:
- Carefully remove and clean the dishwasher’s filters at the bottom of the tub.
- Inspect the drain hose for kinks or blockages. Disconnect it from the sink drain or air gap and check for debris.
- Verify your wall drain or garbage disposal connection is clear.
- Test Drain Pump:
- Locate the drain pump (usually at the bottom of the dishwasher).
- Measure the resistance across the drain pump terminals. A normal reading is around ~217 Ω. A reading far from this value or an open circuit indicates a faulty pump.
- Check Pressure Switch: A malfunctioning pressure switch can sometimes interfere with drain pump operation. While less common for this specific error, it’s worth noting.
- Consider Main PCB: If the drain pump and hoses are clear, and the pump tests fine, the main PCB might be at fault.
E:04 or E4: Water Leakage Error (MIPS Activation)
This error indicates that the MIPS (Multiple Intrusion Protection System) has detected an overflow of water, triggering the overflow switch.
Possible Causes:
- Faulty Wire Harness: Damage or loose connections to the MIPS sensor.
- Actual Water Leak: Water escaping from hoses, seals, or components.
- Damaged Water Hoses: Cracks or holes in supply or drain hoses.
- Faulty MIPS: The overflow switch itself might be defective, even without an actual leak.
Troubleshooting Steps:
- Locate the Leak: Carefully inspect the area beneath and around your dishwasher for any signs of water. Pay close attention to:
- Water supply hose connections.
- Drain hose connections.
- Door gasket.
- Internal components like the wash pump or sump area.
- Check Wire Harness: Ensure the wire harness connector to the MIPS sensor is secure and free of damage.
- Inspect Drain Pump (for damage): Sometimes a damaged drain pump can lead to leaks if it’s not effectively removing water.
- Replace Leaking Components: If you identify a leak, replace the damaged hoses, seals, or components immediately.
- Address MIPS/PCB (No Visible Leak): If there’s no visible water leakage but the E:04 error persists, it strongly suggests a faulty overflow switch (MIPS) or, less likely, a main PCB failure.
E:05 or E5: NTC Sensor Error (Temperature Sensing Issue)
This error points to a problem with the NTC (Negative Temperature Coefficient) sensor, which monitors water temperature.
Possible Causes:
- Faulty Wire Harness: Loose or damaged wiring to the NTC sensor.
- Faulty NTC Sensor: The sensor itself is defective.
- Faulty Main PCB: The main control board is not correctly reading the sensor’s input.
Troubleshooting Steps:
- Check Wire Harness: Ensure the wire harness connector to the NTC sensor is secure and free from damage.
- Test NTC Sensor Resistance:
- Locate the NTC sensor (often near the heating element or sump).
- Using a multimeter, measure the resistance of the NTC sensor at different temperatures. Compare your readings to the chart below:
- 20°C (68°F): ~12.58 kΩ
- 60°C (140°F): ~2.39 kΩ
- If the sensor shows an open circuit (infinite resistance) or a short circuit (zero resistance), or if the readings are significantly off, replace the NTC sensor.
- Consider Main PCB: If the NTC sensor tests good, the main PCB might be the issue.
E:07 or E7: Washing Motor Pump Error (Motor Malfunction)
This error indicates a problem with the main washing motor pump, specifically that the tachometer signal isn’t being detected.
Possible Causes:
- Faulty Wire Harness: Damaged or loose wiring between the motor and the control board.
- Signal Not Detected: The tachometer, which monitors motor speed, isn’t sending a signal.
- Faulty Motor Capacitor: A common failure point for asynchronous motors.
- Faulty Motor Pump: The washing motor itself is defective.
- Faulty Main PCB: The main control board is not correctly communicating with the motor.
Troubleshooting Steps:
- Inspect Wiring: Check the wiring connections between the washing motor and the main control board for any loose or damaged wires.
- Test Motor Capacitor:
- Locate the motor capacitor (often attached to the motor).
- Using a multimeter, measure the capacitance. A healthy reading should be approximately ~4 µF. If the capacitance is significantly lower or zero, replace the capacitor.
- Test Tachometer:
- Locate the tachometer on the motor.
- Measure the resistance across the tachometer terminals. A normal reading is around ~0.154 KΩ.
- Test Motor Pump (Asynchronous Washing Motor):
- Measure the resistance across the motor windings. For an asynchronous washing motor, the resistance should be approximately ~110 Ω.
- Consider Main PCB: If all motor components test healthy, the main PCB might be the underlying issue.
E:08 or E8: Abnormal Heating Temperature Error (Heating Failure)
This error indicates that the dishwasher failed to heat the water to the desired temperature within the scheduled time.
Possible Causes:
- Faulty Wire Harness: Open circuits, loose connections, or leads off place in the heating circuit.
- Faulty Pressure Microswitch: This switch confirms the presence of water before heating begins.
- Defective Heating Element: The component responsible for heating the water is faulty.
- Faulty Pressure Level Switch: Incorrect water level detection can prevent heating.
- Faulty Main PCB: The main control board is not activating the heating element or reading sensor inputs correctly.
Troubleshooting Steps:
- Check Wiring: Inspect all wiring connections between the heating element and the main control board for any damage or looseness.
- Test Heating Element:
- Locate the heating element (usually at the bottom of the tub).
- Using a multimeter, measure the resistance across the heating element terminals. A typical reading for a dishwasher heater is between ~8-9 Ω. If it’s an open circuit (infinite resistance), the element is bad.
- Test Pressure Switch:
- Locate the pressure switch.
- With no water in the dishwasher, the switch should show an open-loop or ∞ Ω (infinite resistance).
- With water in the dishwasher, the switch should show continuity, typically ~0.1 – 1.0 Ω.
- Consider Main PCB: If the heating element, wiring, and pressure switch are all functioning correctly, the main PCB may be faulty.
E:09 or E9: Turbidity Sensor Error (Water Quality Issue)
This error points to problems with the turbidity sensor, which measures the cleanliness of the wash water.
Possible Causes:
- Faulty Wire Harness: Open circuit, loose connections, or leads off place to the turbidity sensor.
- Food Residues: Excessive food particles or debris on the sensor preventing accurate readings.
- Faulty Turbidity Sensor: The sensor itself is defective.
Troubleshooting Steps:
- Inspect Wiring: Check the wiring between the turbidity sensor (T.S.) and the control board for any damage or loose connections.
- Run Pre-Wash Cycle: If excessive foam or food residue is suspected, run a cold pre-wash cycle (without detergent) to help clear the tank.
- Clean Turbidity Sensor: Locate the turbidity sensor (often in the sump area). Gently clean it with a soft cloth to remove any accumulated food residues or film.
- Replace Turbidity Sensor: If cleaning doesn’t resolve the issue, the turbidity sensor may be faulty and require replacement.
E:10 or E10: Communication Failure (Main PCB & User Control)
This error indicates a loss of communication between the main control board (PCB) and the user interface (U.I.) or display panel.
Possible Causes:
- Faulty Wire Harness: Open circuit, loose connections, or leads off place between the main PCB and the U.I.
- Faulty U.I. (User Interface): The display panel or its internal circuitry is defective.
- Faulty Main PCB: The main control board is unable to communicate.
Troubleshooting Steps:
- Check Wiring: Thoroughly inspect the wiring harness connecting the main PCB to the user interface for any damage, disconnections, or loose pins.
- Reprogram Core Board: This step is for authorized technical service only and involves specific software tools. Do not attempt this yourself.
- Replace User Interface (U.I.): If wiring is good and communication is still absent, the user interface itself might be faulty and needs replacement.
- Replace Main PCB: If all other checks are clear and the error persists, the main PCB is likely the culprit.
E:12 or E12: BLDC Washing Motor Error (New Motor Technology)
This error is specific to newer Candy dishwashers equipped with BLDC (Brushless DC) washing motor technology.
Possible Causes:
- Faulty Wire Harness: Damaged or loose wiring to the BLDC motor pump.
- Faulty BLDC Motor Pump: The motor itself is defective.
- Faulty Main PCB: The main control board is not correctly controlling the BLDC motor.
Troubleshooting Steps:
- Check Wiring: Inspect the wiring connections between the main PCB and the BLDC motor for any damage or looseness.
- Measure BLDC Motor Windings:
- Measure the resistance between the three windings of the BLDC washing motor (R, T, and S terminals).
- The resistance between all three pairs (R and T, T and S, S and R) should be approximately ~64.6 Ω and should be roughly equal. Significant deviations or open circuits indicate a faulty motor.
- Consider Main PCB: If the BLDC motor tests healthy, the main PCB might be the underlying issue.
E:14 or E14: Heating Chain Error (Comprehensive Heating System Issue)
This error suggests a broader problem within the entire heating system, indicating a fault in the chain of components responsible for heating.
Possible Causes:
- Faulty Wire Harness: Open circuit, loose connections, or leads off place in the heating circuit.
- Faulty Pressure Safety Microswitch: This switch prevents heating if there isn’t enough water.
- Faulty Heater Assembly: The heating element itself or its housing/connections are defective.
- Faulty Heater Relay: The relay on the PCB that switches power to the heater is stuck or failing.
- Faulty Main PCB: The main control board is failing to manage the heating system.
Troubleshooting Steps:
- Check Wiring: Inspect all wiring harness connectors related to the heating system for any damage or looseness.
- Test Pressure-Safety Microswitch: Verify its functionality as described in E:08 (open without water, closed with water).
- Check NTC Probe: Refer to E:05 for NTC sensor testing. An inaccurate temperature reading can lead to heating chain errors.
- Check Heater Assembly: Test the heating element’s resistance as described in E:08. Also, visually inspect for any cracks or damage to the element or its seals.
- Check Heater Relay: While often integrated into the PCB, a faulty heater relay can be identified by the absence of voltage to the heater when it should be on, or by being stuck in an open/closed position. This typically requires PCB replacement.
E:15 or E15: EEPROM Error (Memory Chip Failure)
This error indicates that the EEPROM (Electrically Erasable Programmable Read-Only Memory) chip, which stores important program data, was not detected or is corrupted.
Troubleshooting Steps:
- Reprogram Core Board: This is a specialized procedure for authorized technical service only and involves re-flashing the firmware.
- Replace Main PCB: If reprogramming is not possible or doesn’t resolve the issue, the main PCB, which houses the EEPROM, needs to be replaced.
E:16 or E16: P.S.M. Shorted Error (Pressure Safety Microswitch)
This error specifically means the pressure safety microswitch is always detected as closed, even when it shouldn’t be.
Possible Causes:
- Faulty Wire Harness: A short circuit within the wiring to the pressure microswitch.
- Faulty Pressure Microswitch: The switch itself is stuck in a closed position.
- Faulty Main PCB: The main control board is misinterpreting the switch’s signal.
Troubleshooting Steps:
- Check Wire Harness: Inspect the wiring harness connected to the pressure safety microswitch for any signs of damage or short circuits.
- Replace Microswitch: If the wiring appears fine, the pressure safety microswitch is likely faulty and should be replaced.
- Check Heater Relay: In some cases, a faulty heater relay can contribute to this error. While less common, it’s worth noting.
E:17 or E17: Heater Relay Error (Specific Relay Issue)
This error points directly to a problem with the heater relay, which controls power to the heating element. It can also be a software-related issue.
Possible Causes:
- Flickering Safety Microswitch: An intermittent signal from the safety microswitch can confuse the relay.
- Temperature Probe Out of Order: An inaccurate temperature reading can cause the relay to misbehave.
- Board Relay Stuck Open: The relay itself is physically stuck in an open position, preventing power to the heater.
- Software Issue: A known software glitch in early cycles can cause this error.
Troubleshooting Steps:
- Wait and Reset: Sometimes, simply waiting for at least 10 minutes and then power cycling the dishwasher (unplugging and replugging) can resolve a temporary software glitch.
- Replace Main PCB: If the defect persists or recurs after a reset, it is highly probable that the main PCB needs replacement, as the heater relay is integrated into it, or a software issue is inherent to the board.
E:18 or E18: Water Level Error (Incorrect Water Loading)
This error indicates that an incorrect water level was detected during the water loading phase.
Possible Causes:
- Defective Water Inlet Valve: The valve might be partially open or not closing completely, leading to overfilling.
- Clogged Air Trap Chamber: This chamber, connected to the pressure switch, can become clogged, leading to inaccurate water level readings.
- Damaged Pressure Switch Hose: A leak or blockage in this hose can prevent the pressure switch from accurately detecting water levels.
- Faulty Pressure Level Switch: The sensor responsible for detecting water levels is defective.
Troubleshooting Steps:
- Check Solenoid Valve: Verify that the water inlet valve is fully closing after the water load. You might hear a faint hiss or dripping if it’s not.
- Clean Air Trap Chamber: Locate and clean the air trap chamber, which is often a small plastic component connected to the pressure switch by a thin hose.
- Inspect Pressure Switch Hose: Check the thin hose connecting the pressure switch to the air trap chamber for any leaks, cracks, or blockages.
- Replace Pressure Level Switch: If the other components appear fine, the pressure level switch itself is likely faulty and needs replacement.
E:21 or E21: Flowmeter Error (Stuck Solenoid Valve)
This error specifically points to the solenoid valve being stuck in the open position, leading to continuous water intake.
Possible Causes:
- Damaged Water Inlet Valve (Always Opened): The valve is physically stuck open and won’t close.
- Faulty Flow Meter Sensor: The sensor that measures water flow is defective and sending incorrect signals.
Troubleshooting Steps:
- Check Reed Switch (part of Flowmeter): The flow meter often contains a reed switch. You can test its continuity with a multimeter as water flows. If it doesn’t respond to water flow, the flow meter is faulty.
- Replace Water Inlet Valve: If the water inlet valve is visibly stuck open or continuously allowing water to flow, it needs immediate replacement.
Conclusion: Empowering You to Fix Your Dishwasher
By understanding what each Candy dishwasher error code signifies and systematically following these troubleshooting steps, you’ll be well-equipped to diagnose and often resolve many common dishwasher issues yourself. We hope this guide has provided you with the confidence and knowledge to get your Candy dishwasher back to its efficient, dish-cleaning best!

I am a master Appliance Repair technician with over 35 years of experience in the field. I am passionate about helping people troubleshoot their appliances and fix common problems. My website, appliancemode.com, provides a wealth of information on troubleshooting common appliance issues and deciphering error codes. This website aims to empower people to tackle appliance repairs themselves and save money on service calls.


