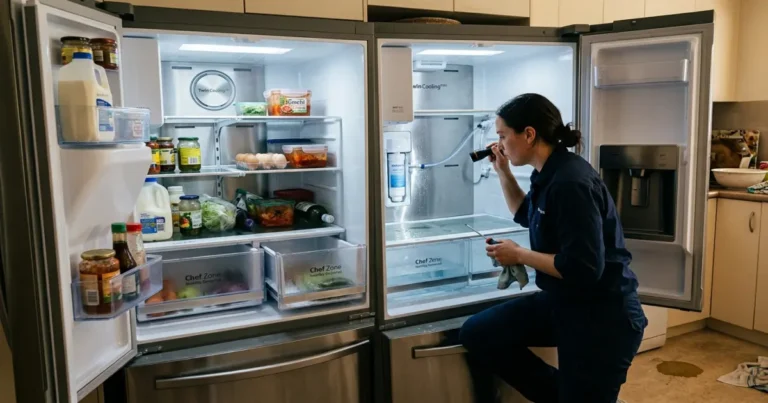
How To Check Error Codes On LG Refrigerators
LG refrigerators are equipped with advanced diagnostic systems that detect faults and display error codes when a problem occurs. These codes help identify issues related to cooling performance, fans, sensors, defrost systems, ice makers, water flow, communication errors, and control board failures.
Understanding error codes on LG refrigerators can help you quickly diagnose the problem and determine whether it is a simple fix or a repair that requires a qualified technician.
⚠️ Important Safety Note
DANGER: Electric Shock Hazard
Always unplug the refrigerator or shut off the circuit breaker before inspecting electrical components, wiring, or fans. Use a digital multimeter (DMM) with caution when testing live voltage.
How to Read & Reset Error Codes On LG Refrigerator
- On-Screen Display: Error codes appear on the digital control panel, usually prefixed by “Er” (e.g., “Er FF” or “Er rS”).
- Smart Diagnosis™: For app-enabled models, open the LG ThinQ® app, navigate to Smart Diagnosis, and hold your phone near the speaker icon on the refrigerator to transfer diagnostic data.
- How to Reset: Most codes clear automatically once the fault is fixed. To clear a temporary glitch, unplug the refrigerator for 5 to 10 minutes, then plug it back in.
Master Index of Error Codes On LG Refrigerator
Fan Motor Errors
| Error Code | Description | Potential Causes | Troubleshooting & Solutions |
| E CF | Condenser Fan Error | Blocked fan blade, loose harness at the main board, dead motor. | Check for debris under the fridge. Verify 12 Vdc at the motor. Clean coils. |
| E FF | Freezer Fan Error | Ice buildup is binding the blade, the motor is bad, and the harness is open. | Defrost the freezer. Check fan blade rotation. Verify 12 Vdc to the motor. |
| E rF | Refrigerator Fan Error | Evaporator fan failure, wiring issue, and main PCB fault. | Inspect the fresh food compartment fan. Test voltage at the main board. |
| E IF | Ice Maker Fan Error | Ice jam blocking the fan, failed motor harness. | Clear ice blockages in the door duct. Check fan resistance. |
Temperature & Sensor Errors
| Error Code | Description | Potential Causes | Troubleshooting & Solutions |
| F dS | Defrost Sensor Error | Short or open circuit in defrost thermistor assembly. | Test sensor resistance (approx. 9.8 kΩ at 25°C). Replace if failed. |
| E FS | Freezer Sensor Error | Defective freezer room thermistor or loose plug. | Check harness continuity. Test sensor resistance (approx. 2.3 kΩ at 25°C). |
| E rS | Refrigerator Sensor (Upper) | Defective fresh food compartment sensor. | Measure resistance (approx. 9.8 kΩ at 25°C) at the main board plug. |
| E r2 | Refrigerator Sensor 2 Error | Secondary fresh food sensor malfunction. | Treat identically to E rS. Check secondary sensor harness. |
| E HS | Humidity Sensor Error | Internal humidity sensor failure or loose harness. | Check voltage drop at the sensor pinouts. Replace sensor assembly. |
| E rt | Room Temperature Sensor | Ambient sensor failure (outside the cabinet). | Check the top hinge cover sensor. Test for approx. 9.8 kΩ at 25°C. |
| E Id | Craft Ice Maker Sensor | Sensor fault in the spherical ice tray system. | Measure sensor resistance. Ensure wire harness at ice maker is secure. |
| E IS | Standard Ice Maker Sensor | Built-in icemaker thermistor failure. | Inspect the plug beneath the ice maker assembly. Replace if shorted. |
Communication Failures
| Error Code | Description | Potential Causes | Troubleshooting & Solutions |
| E CO | Main-to-Display Comm Error | Broken wire in top door hinge, loose plug at display/PCB. | Inspect the top door hinge wire bundle for pinches or cuts. Reseat plugs. |
| E C1 | Dispenser Comm Error | Communication line dropped to dispenser board. | Remove dispenser panel and check wire harness connections. |
Auto-Door & Smart Drawer Errors
| Error Code | Description | Potential Causes | Troubleshooting & Solutions |
| E AS | Auto-Door Switch Error | Misaligned door, broken reed switch, bad magnet. | Test the reed switch using a magnet and a multimeter. Check alignment. |
| L AS / r AS | Left / Right Auto Drawer Switch | Actuator switch failing on automated drawer models. | Inspect the specific drawer track switch and wiring harness. |
| I LS / U LS | Smart Auto Drawer / Lift Switch | Sensor failure on automated lift/drawer mechanisms. | Check for physical obstructions blocking the lifting tracks. |
| E dL / E dr | Left / Right Auto Drawer Module | Motor failure, broken gear, or Hall IC fault. | Check hall sensor voltage (5–10 Vdc). Replace motorized drawer track. |
| E Ad / I Ld | Auto Door / Smart Drawer Module | The control module cannot actuate the mechanical assembly. | Verify main board power output to the door/drawer drive modules. |
| U Ld | Smart Auto-Lift Module Error | Lift motor or control module failure. | Check wiring harness connector at the base of the lift unit. |
Defrost & Ice System Errors
| Error Code | Description | Potential Causes | Troubleshooting & Solutions |
| F dH | Defrost Heater Fault | The defrost loop didn’t heat past 8°C within 2 hours. | Test defrost heater (approx. 50 Ω) and thermal fuse (0.1–1.2 Ω). |
| E IU | Craft Ice Maker Unit Error | Stepper motor, heater, or gear alignment failure. | Clear jammed ice. Check craft ice assembly wiring. Replace unit if stuck. |
| E It | Standard Ice Maker Unit Error | Jammed ice ejector arm, mechanical motor failure. | Clear ice bucket overfill. Run a manual ice maker test cycle. |
System Alerts & Environment Codes
| Error Code | Description | Potential Causes | Troubleshooting & Solutions |
| OFF / OF A | Demo / Showroom Mode | Accidentally enabled during cleaning or delivery. | To turn off: Press and hold the Refrigerator and Express Freeze buttons simultaneously with the door open until a beep sounds. |
| Sb / 5b | Sabbath Mode | Religious observance mode active. | To turn off: Press and hold the Smart Grid and Freezer buttons (or see the model manual). Auto-exits after 96 hours. |
| E CH | High-Side Cycle Leak | Refrigerant leak, failed 3-way valve, compressor fault. | 🛑 Do Not DIY. Requires a certified EPA technician to repair the closed loops. |
| E CL | Low-Side Cycle Leak | Evaporator loop leak or low refrigerant. | 🛑 Do Not DIY. Contact LG Authorized Service immediately. |
| E FU | Failing Unit Error | Complete cooling loss, door left open, failed compressor. | Check door gaskets. Clean condenser coils. Verify if the compressor is running. |
| E gF | Flow Meter Sensor Error | Low water pressure, a kinked water line, or a bad flow meter. | Straighten the water line behind the fridge. Ensure the home water valve is fully open. |
| E gS | Gas Sensor Error | Pure N Fresh™ ventilation system sensor fault. | Replace the air filter element and inspect the filter housing harness. |
| Hi | High Ambient Temperature | Kitchen/room temperature is above 50°C (122°F). | Cool down the room environment. Ensure adequate clearance around the unit. |
| Lo | Low Ambient Temperature | Kitchen/room temperature is below -10°C (14°F). | Do not operate the unit in unheated garages or porches. Move to a warm room. |
Electrical Component Specifications
If you are using a multimeter to diagnose the source of an error code, use these standard LG target values to identify components that have failed:
Sensors & Electronics
| Component | Test Parameter | Expected Value | Failure Sign |
| Defrost Sensor | Resistance | ~9,800 Ω at 25°C (77°F) | OL (Open Line) or short circuit |
| Freezer Sensor | Resistance | ~2,300 Ω at 25°C (77°F) | OL or short circuit |
| Refrigerator Sensor | Resistance | ~9,800 Ω at 25°C (77°F) | OL or short circuit |
| Room Temp (Ambient) | Resistance | ~9,800 Ω at 25°C (77°F) | OL or short circuit |
| Hall Sensor (Drawers) | Resistance | ~17.4 kΩ (Black to Red wire) | No resistance reading |
| Hall Sensor (Drawers) | Input Voltage | 5 to 10 Vdc | 0 Vdc from the Main PCB |
Heating Elements
| Component | Test Parameter | Expected Value | Failure Sign |
| Defrost Heater | Resistance | ~50 Ω | OL (Burned-out heating element) |
| Thermal Fuse | Resistance | 0.1 to 1.2 Ω (at 76°C) | OL (Blown thermal safety limit) |
Fan Motor Voltage Checkpoints
For both 3-wire and 4-wire BLDC fan configurations:
[ VCC (Red) ] ------------ ~12 Vdc (Main Power Source) ------------> [ GND (Black) ]
[ FG (White) ] ----------- ~2.4 Vdc (Rotation Feedback Signal) ----> [ GND (Black) ]
[ PWM (yellow) ] ----------- 1.2 to 4.6 Vdc (Speed Control Signal) --> [ GND (Black) ]- Note: 3-wire fan versions do not include the yellow PWM control wire. If VCC is receiving 12 Vdc but the FG feedback reads 0 Vdc while the fan is stuck, the motor is dead and must be replaced.
Advanced Diagnostic Steps & Control Board Testing
When error codes persist after initial resets, testing components directly from the Main Power Control Board (PCB)—usually located in a panel on the back or top of the refrigerator—saves you from tearing apart the interior liners.
Step-by-Step Main Board Test Procedure
- Power Down: Unplug the refrigerator and wait 60 seconds.
- Access the PCB: Remove the metal cover plate on the back or top of the cabinet.
- Locate Test Buttons: Most LG main boards feature a small micro-switch tactile button labeled TEST1 (or simply TEST).
- Forced Test Mode: Plug the unit back in and press the test button to manually force components on for multimeter testing:
- Press 1 Time (Forced Operation): Forces the compressor and all fans (freezer, refrigerator, and condenser) to run at maximum speed. Perfect for diagnosing fan voltage dropouts.
- Press 2 Times (Forced Defrost): Turns off the compressor and activates the defrost heater loop. Use this to immediately check if 120 Vac is being sent to the defrost heater assembly.
- Press 3 Times (Reset): Returns the refrigerator to normal operating conditions.
Final Conclusion
Error codes on LG refrigerators are essential diagnostic tools that help identify faults quickly and accurately. By understanding how fan systems, sensors, ice makers, and control boards interact, you can significantly reduce troubleshooting time and avoid unnecessary repairs.

I am a master appliance repair technician with over 35 years of experience in the field. I am passionate about helping people troubleshoot their appliances and fix common problems. My website, appliancemode.com, provides a wealth of information on troubleshooting common appliance issues and deciphering error codes. This website aims to empower people to tackle appliance repairs themselves and save money on service calls.