Troubleshooting The Samsung Washing Machine Error Codes
Cracking the Code: Your Guide to Samsung Washing Machine Errors
Is your Samsung washing machine displaying a mysterious code on its control panel? Don’t panic! These codes are actually helpful clues, designed to tell you exactly what’s wrong so you can get your laundry back on track.
In this guide, we’ll break down common Samsung washing machine error codes and provide straightforward solutions to help you troubleshoot and fix the issue.
Common Samsung Washing Machine Error Codes and How to Fix Them
Important Note: Always unplug your washing machine before attempting any repairs. Safety first!
1C (Water Level Sensor Error)
(Also appears as: IC, 1E, IE)
This code indicates an issue with your washer’s water level sensor.
Possible Causes:
- Loose or incorrect wiring to the sensor.
- A clogged air chamber.
- A leaky or damaged air-water level sensor hose.
- A faulty water level sensor.
- A problem with the main PCB (Printed Circuit Board).
Solutions:
- Check Sensor Connections: Inspect and repair any loose or damaged wires connected to the water level sensor. Replace the harness if needed.
- Secure Hoses: If you notice air leaking at the sensor hose connection, use a hose clamp. If the hose itself has a small leak (a “pinhole”), replace it.
- Clean Air Chamber: Remove and clean any foreign material from the air chamber.
- Inspect/Replace Sensor: Verify the water level sensor’s frequency and ensure it’s the correct part for your model. If it’s defective, replace it.
- Test PCB Connections: Check the connectors at the main PBA (Power Board Assembly) and/or sub-PCB.
- Voltage Check (Advanced): If you’re comfortable with a multimeter, check the DC voltage on the harness:
- Main Voltage: Between pin 2 (VCC) and pin 3 (GND) should be ~5 Vdc.
- Output Voltage: Between pin 1 (OUT) and pin 2 (GND) should be ~2.1 Vdc.
- Frequency: Between pin 1 (OUT) and pin 2 (GND) should be ~26.4 kHz (without water).
- If voltages are missing or incorrect, replace the sub-PCB (if your model has one) or the main PCB.
3C (Motor Driving Error)
(Also appears as: 3C1, 3C2, 3C3, 3C4, 3E, 3E1, 3E2, 3E3, 3E4)
This code signals a problem with the washing machine’s motor.
Possible Causes:
- Incorrect connections for the washing motor or hall sensor.
- A faulty motor hall sensor.
- A faulty motor rotor and/or stator.
- A faulty inverter PCB.
- A faulty main PCB.
Solutions:
- Check for Obstructions: Ensure nothing is obstructing the drum’s rotation (e.g., an object jammed between the outer tub and drum). If the drum isn’t spinning freely, it could be a blockage or damaged bearings.
- Measure Motor Coil Resistance: Use a multimeter to check the resistance of the motor coil windings. They should be consistent:
- Direct-drive motor: Approximately 12.4 Ω between U, V, and W.
- BLDC motor: Approximately 5.2 Ω between U, V, and W.
- An abnormal reading (e.g., 0.1 Ω, ∞ Ω, or OL) indicates a problem.
- Check Hall Sensor Resistance:
- Between VCC and Ha / VCC and Hb: Approximately 4.7 KΩ.
- Between Ha and Hb: Approximately 9.4 KΩ.
- Rotate the drum by hand and observe if the resistance changes (this indicates a functioning motor feedback signal).
- Replace Main PCB: If the above checks are normal, the main PCB is likely faulty and needs replacement.
AE6 (Communication Error – Main PBA & Inverter PBA)
This error indicates a communication breakdown between the main control board and the inverter board.
Possible Causes:
- A faulty harness connection between the boards.
- A faulty inverter PCB.
- A faulty main PCB.
Solutions:
- Check Wire Connections: Inspect the wire connection between the main PBA and the inverter PBA for any looseness or damage.
- Verify Inverter PBA (LED Flash):
- Unit off: LED should be off.
- Unit on: LED should flash 1 second on, 1 second off.
- Verify Main PBA (LED Flash):
- Unit off: LED should flash 1 second on, 5 seconds off.
- Unit on: LED should flash 5 seconds on, 1 second off.
- If either LED pattern is incorrect, replace the respective PCB.
4C (Water Supply Error)
This code points to an issue with water filling the machine.
Possible Causes:
- Damaged wiring to the water supply valve.
- A faulty water supply valve.
- Frozen water lines during cold weather.
- A faulty pressure sensor hose.
- A damaged main PCB.
- A flood-safe water supply line that has shut off.
Solutions:
- Inspect Water Valves: Check for physical damage or clogs (like calcification) in the water inlet valves.
- Flood-Safe Hoses: If you have flood-safe hoses, they might have tripped. Check if they need to be reset.
- Frozen Pipes: If it’s cold, your water lines or valves might be frozen. Allow them to thaw. Consider relocating the unit if it’s consistently exposed to freezing temperatures, as this can damage valves.
- Check Wiring: Visually inspect the water valve harness for damaged or torn wires. Repair or replace as needed.
- Measure Continuity: On the main PCB, measure the continuity of the wire leading to the valve; it should be less than 2 Ω.
- Inspect Pressure Sensor Hose: Thoroughly check the pressure sensor hose for any damage or small holes. Replace if damaged. Ensure it’s properly connected to the water level sensor.
4C2 (Water Supply Error – Temperature Related)
This code suggests a problem with the hot water supply or temperature sensing.
Possible Causes:
- Reversed hot and cold water supply lines.
- A faulty temperature sensor.
- A fault with the main PCB.
Solutions:
- Check Hot Water Connection: Ensure the hot and cold water taps are connected correctly and not reversed.
- Measure Water Inlet Valve Resistance:
- For 110Vac systems: 0.9 ~ 1.1 kΩ.
- For 220Vac systems: 3.8 ~ 4.6 kΩ.
- Heater Power Supply: Verify that 120 VAC is consistently supplied to the heater assembly from the main PCB.
- Check Temperature Sensor Resistance: At 25°C/77°F, the temperature sensor should have a resistance of approximately 13 KΩ.
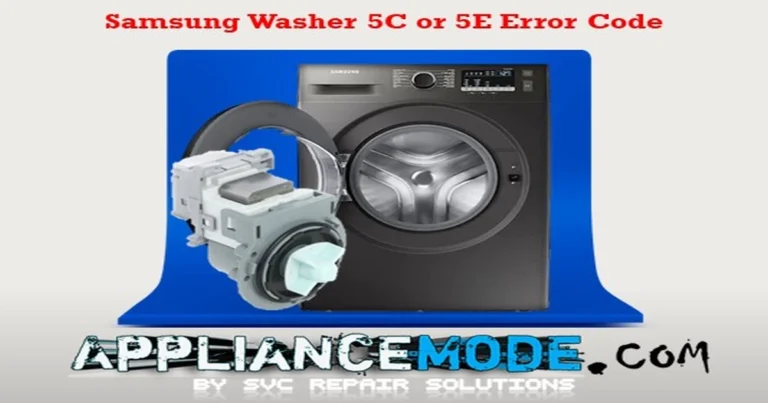
5C (Drain Error)
This code indicates an issue with the washing machine’s ability to drain water.
Possible Causes:
- Freezing conditions.
- Foreign objects in the drain pump.
- A poor physical connection to the drain pump.
- A faulty drain pump.
- A faulty main PCB.
Solutions:
- Clear Drain Pump: Check the drain pump motor for any foreign substances (e.g., lint, coins, small items) and remove them.
- Measure Drain Pump Resistance:
- For 110Vac systems: 13 ~ 16 Ω.
- For 220Vac systems: 120 ~ 180 Ω.
- Replace the drain pump if it’s shorted or open.
- Check Voltage to Drain Pump: Enter manual check mode and verify that 120 volts are being supplied to the drain pump from the main PCB.
9C1 (Power Error)
This error typically occurs when the washing machine receives an abnormal power supply.
Possible Causes:
- Over- or under-voltage supplied to the appliance.
- A faulty main PBA.
Solutions:
- Check Wire Harness: Inspect all wire harness connections for looseness or damage.
- Test Outlet Voltage: Use a multimeter to check the AC outlet voltage while the machine is running a cycle. It should be between 110V and 130V AC.
- Check Noise Filter: Inspect the noise filter.
- Verify Main PBA (LED Flash):
- Unit off: LED should flash 1 second on, 5 seconds off.
- Unit on: LED should flash 5 seconds on, 1 second off.
- If the voltage is stable and the error persists or the LED pattern is incorrect, replace the main PBA.
AC (Communication Error – Main PBA & Sub PBA)
(Also appears as: AE, AC6, ACb)
This code signifies a communication problem between the main control board and the sub-control board.
Possible Causes:
- Signals between the main PBA and sub-PCB are not detected.
- Disconnected or loose wiring.
- Moisture or water damage to the sub-PCB (e.g., from spilled detergent).
Solutions:
- Check Wire Connections: Inspect the wire connection between the main PBA and the sub-PBA for any disconnected or loose wires.
- Inspect Sub-PCB: Visually check the sub-PCB for any signs of moisture or water damage. Spilled detergent can sometimes damage the board.
- Verify Main PBA (LED Flash):
- Unit off: LED should flash 1 second on, 5 seconds off.
- Unit on: LED should flash 5 seconds on, 1 second off.
- If the LED pattern is incorrect, replace the main PCB.
- If the error persists after these checks, replace the sub-PBA.
dC (Door Switch Error)
(Also appears as: dC1, ddC, dC3, dE, dE1, dE2, dC2, DOOR)
This error indicates a problem with the washing machine’s door lock mechanism.
Possible Causes:
- A faulty door-lock switch.
- A faulty reed switch.
- A faulty main PCB.
Solutions:
- Check Door Switch Power: Verify 120 Vac power supply to the door switch lock at the main PCB. Also, check the door switch unlock power supply at 120 VAC from the main PCB.
- Inspect Wiring: Check and repair any damaged or poorly insulated power wire harness connections.
- Test/Replace Door Switch:
- Type 1 (Specific Resistance): Check the resistance of the door switch.
- Between pin 1 and 3: Approximately 120Ω.
- Between pin 1 and 2: Approximately 58Ω.
- Between pin 2 and 3: Approximately 60Ω.
- Replace the door switch if it’s faulty.
- Type 1 (Specific Resistance): Check the resistance of the door switch.
HC (Heater Error)
(Also appears as: HE, HE1, HE2, HC1, HC2)
This code points to an issue with the washing machine’s heating element.
Possible Causes:
- Disconnected wiring to the heater.
- A faulty heater.
- A faulty wash thermistor (temperature sensor).
- A faulty main PCB.
Solutions:
- Check Connections: Verify all connections between the main PCB, wire harness, and heater.
- Measure Heater Resistance: If the wash heater is faulty, replace it. Check its resistance:
- For 110Vac systems: 16 Ω.
- For 220Vac systems: 30 Ω.
- Check Heater Power:
- Run a quick wash cycle with hot water selected and check for 120 VAC power to the heater after 5-10 minutes.
- Alternatively, enter manual service mode, ensure enough water is filled, and then check the heater function.
- Read Temperature Sensor Resistance: The wash thermistor should read approximately 13 kΩ at room temperature.
LC (Water Leakage Error)
(Also appears as: LE, LE1, LC1)
This error indicates water detected on the base of the washing machine, suggesting a leak.
Possible Causes:
- Loose or disconnected hoses.
- A damaged or disconnected water pressure sensor hose.
- An air hose out of place, causing leaks during the spin cycle.
- Excessive suds from too much detergent, leading to foaming and leakage.
Solutions:
- Inspect for Leaks: Check the base, hoses, valves, and tube connections for any signs of leakage.
- Check Temperature Sensor/Heater: Inspect the temperature sensor and heater assembly for leaks.
- Drain Pump Area: If you have a drain pump with automatic drainage, check for any foreign material in the bellows (e.g., underwear wires, coins).
- Pressure Sensor Hose: Thoroughly inspect the pressure sensor hose for damage or small holes. Replace if damaged and ensure it’s properly connected to the pressure sensor and the washer tub.
- Water Valve Conditions: Check the condition of the water valves.
- Drain Hose Installation: Ensure the drain hose is properly installed to prevent water from siphoning back into the washer.
- Detergent Usage: This error can occur due to excessive suds. Ensure you’re using the correct amount of HE (high-efficiency) or low-suds detergent as recommended for front-load washers.
SUD (Over Suds Error)
(Also appears as: Sd, 5d)
This code indicates an excessive amount of suds inside the washing machine.
Possible Causes:
- Too much detergent used.
- The wrong type of detergent being used (e.g., not HE detergent for a front-loader).
Solutions:
- Use Correct Detergent Amount: Advise the customer to use the proper amount of detergent as specified by the detergent manufacturer and their washing machine’s owner’s manual.
- Use HE Detergent: Emphasize the importance of using HE (high-efficiency) or low-suds detergent specifically formulated for front-load washers. Excessive suds can cause problems by interfering with the water level sensor.
UB (Unbalanced Error)
(Also appears as: UE)
This code means the washing machine’s load is unbalanced, preventing proper spinning.
Possible Causes:
- Improperly loaded laundry (e.g., overloaded or unevenly distributed).
- An uneven washing machine basket.
- Defective dampers (shock absorbers).
- An unlevel installation.
Solutions:
- Rebalance Load: Instruct the customer to pause the cycle, open the door, rebalance the laundry, or remove a few items, then press start to resume. Avoid overfilling the washer (don’t fill more than 3/4 full).
- Level the Unit: Ensure the washing machine is properly leveled and that the floor it’s installed on is even. Check for broken or bent legs.
- Inspect Dampers: Visually inspect the dampers for any physical abnormalities.
- Note: This error indicates abnormal tub spinning detected by the hall sensor; it doesn’t necessarily mean a faulty hall sensor. The root cause is usually the unbalanced load or installation.
OE, OC (Overflow Error)
(Also appears as: 0E, 0C)
This code signifies that the washing machine has detected an overflow of water.
Possible Causes:
- A faulty water level sensor.
- Freezing conditions causing components to malfunction.
- Excessive detergent usage leading to over-foaming.
- A water inlet valve that remains open or leaks.
Solutions:
- Check Water Level Sensor: If the water level sensor is malfunctioning, replace it.
- Inspect Hose: Check the hose connected to the water level sensor. Ensure it’s not torn, has no holes, or is folded.
- Freezing Issues: If the error occurs during winter, water might be frozen. Consider relocating the unit to a warmer area to prevent damage to valves.
- Detergent Usage: Explain that using too much normal detergent (especially for top-loaders) can cause excessive foam, leading to an overflow error. Recommend using the correct amount of HE (high-efficiency) or low-suds detergent.
- Note: Oversuds can enter the pressure hose, creating varying pressure readings that trigger these codes.
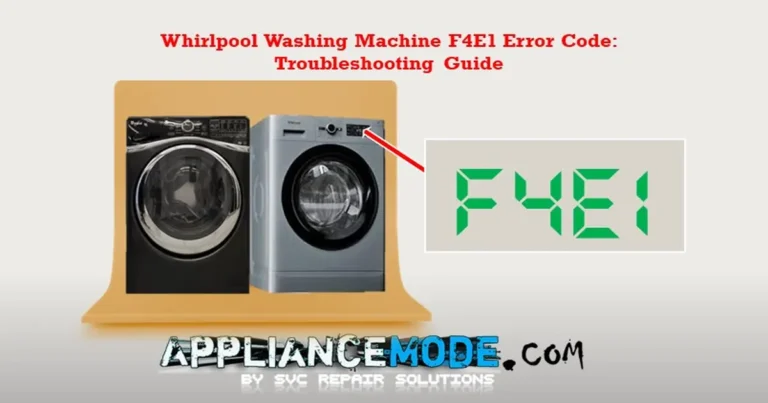
tC1 (Temperature Sensor Error)
(Also appears as: tE, tE1, tE2, tE3, tC, tC2, tC3, tC4)
This code points to an issue with the washing machine’s temperature sensor.
Possible Causes:
- A faulty washing temperature sensor.
- A faulty main PCB.
- Freezing conditions affecting the sensor.
- A damaged wire harness.
Solutions:
- Check Connections: Inspect the connections to the washing heater temperature sensor.
- Replace Sensor: If the washing heater temperature sensor is malfunctioning, replace it.
- Measure Thermistor Resistance: The thermistor (temperature sensor) should have a resistance of approximately 10-15 kΩ at 25°C/77°F.
- Check Sensor Voltage: Verify 5VDC on the sensor from the main PCB.
SF (Microcontroller Operation Fail / System Failed)
This code indicates a general system failure or an incorrect signal detected by the main control board.
Possible Causes:
- The main PBA detecting an incorrect input signal.
- A general malfunction of the main PCB’s microcontroller.
Solutions:
- Power Cycle: Turn the washer off, wait 2-3 minutes, then power it back on and try again.
- Replace Main PCB: If the fault code persists, the main PCB likely needs to be replaced.
bE (Stuck Button Error)
(Also appears as: bE2, bC2)
This code means a button on the control panel is stuck or continuously pressed.
Possible Causes:
- A button is physically stuck.
- A defective sub-PCB or control panel.
Solutions:
- Check Buttons: Inspect all buttons on the control panel to see if any are stuck. Gently try to free them. If a button remains stuck, the control panel may need adjustment or replacement.
- Replace Sub-PCB: If the issue isn’t a physically stuck button, the sub-PCB (user interface board) may be defective and require replacement.
8C (MEMS Sensor Error)
(Also appears as: 8C1, 8C2, 8E, 8E1, 8E2)
This code indicates an issue with the MEMS (Micro-Electro-Mechanical System) sensor, which detects vibrations and imbalance.
Possible Causes:
- A faulty MEMS sensor wire connection.
- A faulty MEMS sensor.
Solutions:
- Repair Wiring: Repair the MEMS sensor wire harness connector and replace it if necessary.
- Replace Sensor: Replace the MEMS sensor if it’s faulty.
Child Lock Icon
This is not an error code, but rather an icon notification indicating that the child lock feature is activated.
Solution:
- Refer to your Samsung washing machine’s user manual for specific instructions on how to deactivate the child lock feature. This usually involves pressing and holding a combination of buttons for a few seconds.
Conclusion
Samsung washing machine error codes are designed to be a helpful diagnostic tool. By understanding what each code means and following these troubleshooting steps, you can often identify and resolve common issues yourself, saving you time and potentially a service call.

I am a master appliance repair technician with over 35 years of experience in the field. I am passionate about helping people troubleshoot their appliances and fix common problems. My website, appliancemode.com, provides a wealth of information on troubleshooting common appliance issues and deciphering error codes. This website aims to empower people to tackle appliance repairs themselves and save money on service calls.